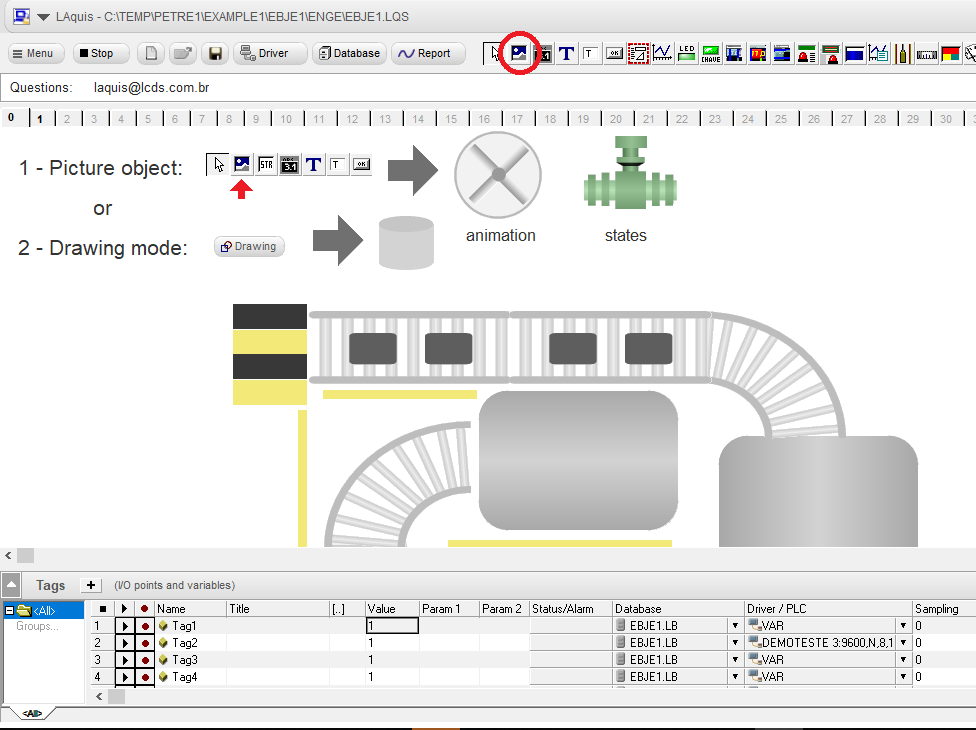
We will show how the external pictures are configured as objects or animation.
(optionally download this example and unpack in a new folder: External pictures example)
First, to be sure, copy the pictures in the same folder as your project application.
Three types,
- 1 – picture with double status,
- 2 – picture with active color,
- 3 – picture with animation.
The best type of external picture is with the EMF or WMV extension. That’s because it is vector, and its size can be changed freely. But the types .BMP, JPEG or GIF can be used.
Select the picture object and place it on the screen.
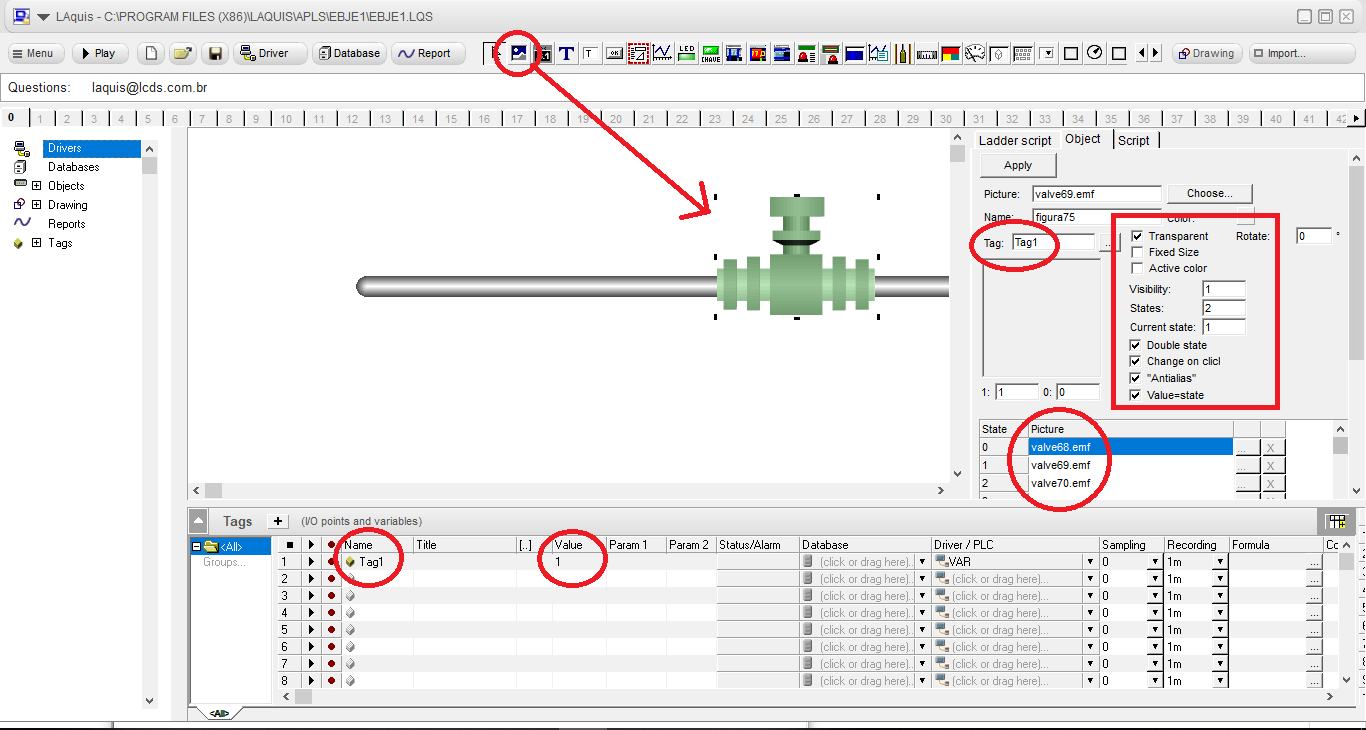
1 – Picture with double status.
Associate it with the desired tag, in this digital case. Select the object and place the properties on the right side of the screen. In this case, we will place the pictures in states 0, 1 and 2. Activate the properties as shown below. The object will behave like this: when the tag is 0, it will show the picture of state 0. When the tag is 1, it will show the picture of state 1. But, if you want, you can put a state 2 for alarm. If the Click property changes, if the user clicks on the object, it will invert the tag’s value. It can be done like this:

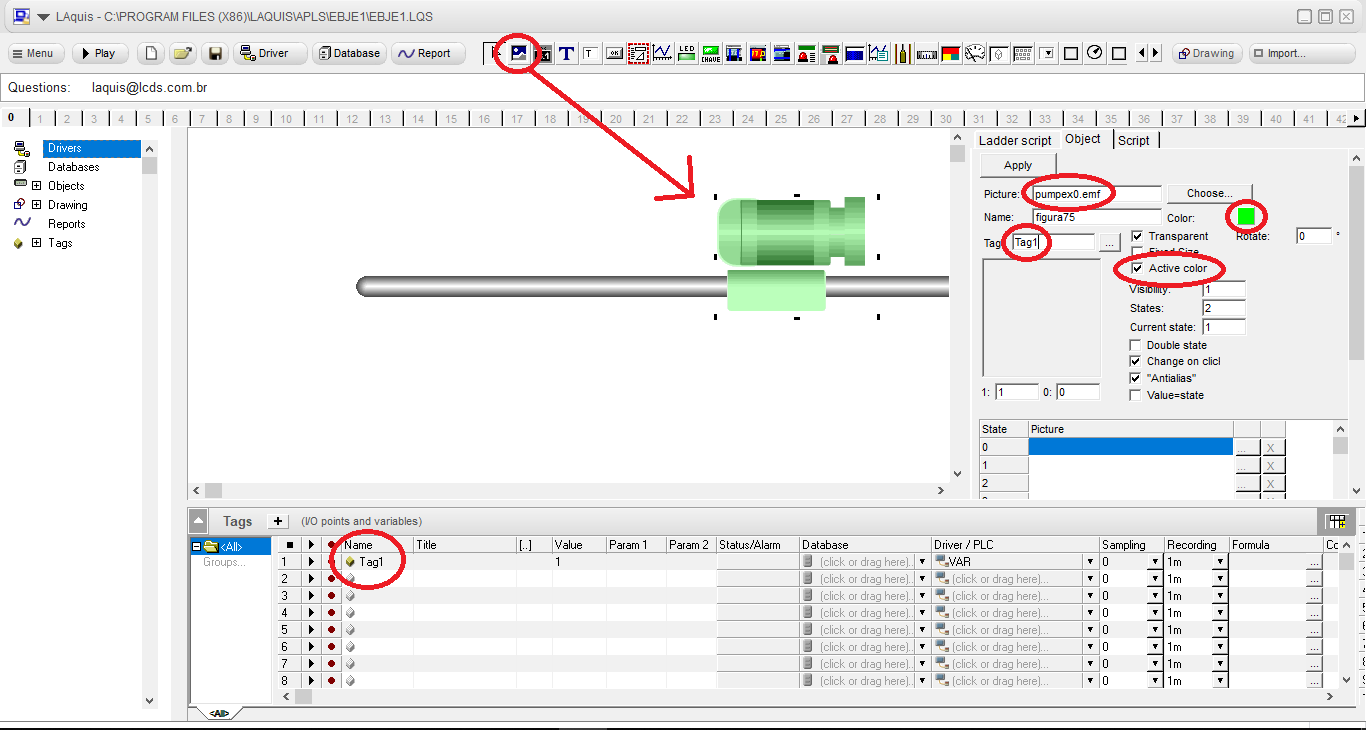
2 – Picture with active color:
If the type of the picture is vector, emf or wmf, then you can select the active color property. The system changes the color of the object when the tag is activated. Select the picture only the picture property like this:

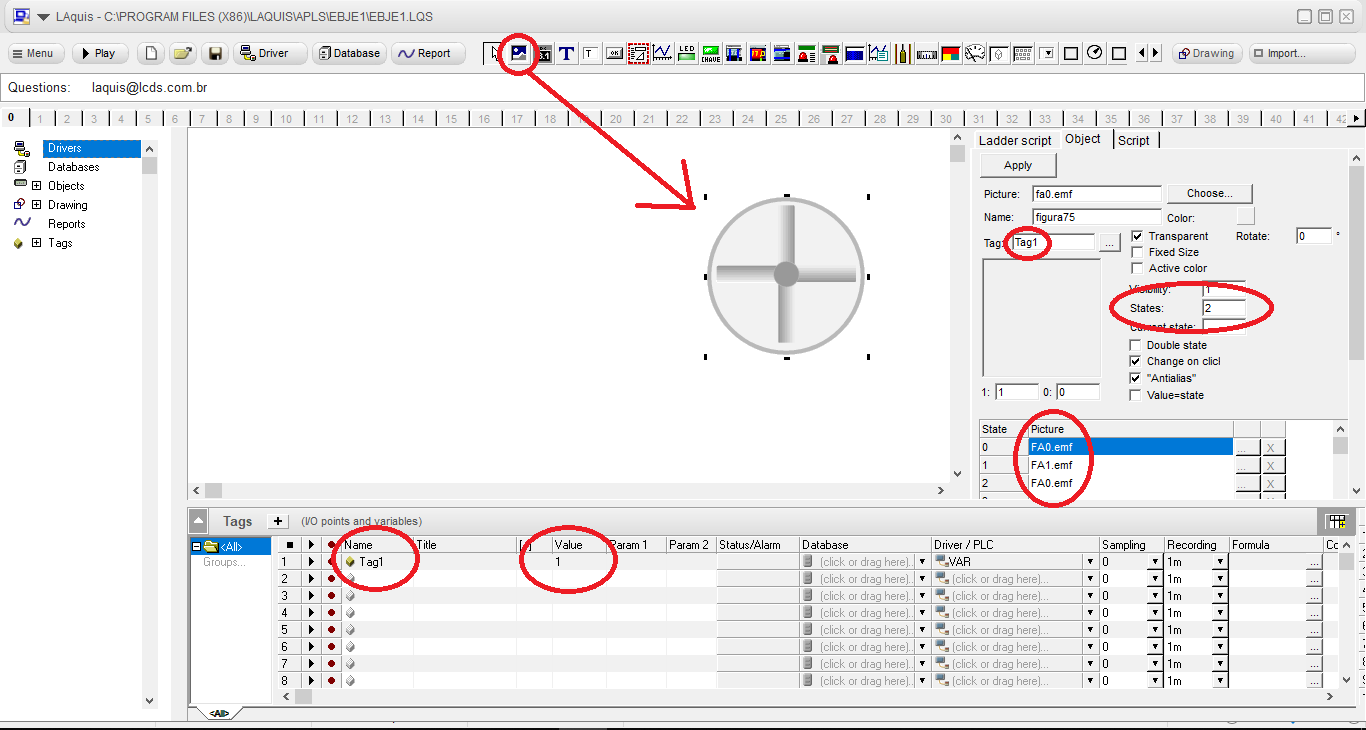
3 – Picture with animation:
To make an animated picture of several states when the tag is active, then set the properties in this way. The picture in state 0 is when the tag is inactive. The pictures from state 1 are the pictures of the animation. The number of states must also be defined in the states property as follows:

Example, download and unpack in a new folder:
