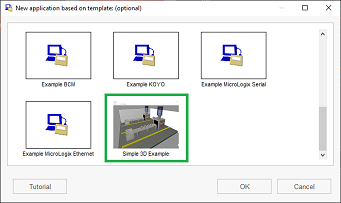
Simple 3D example: download and install LAquis SCADA, click on button Menu – New – select the “Simple 3D Example”:
Click on the Play button to test.
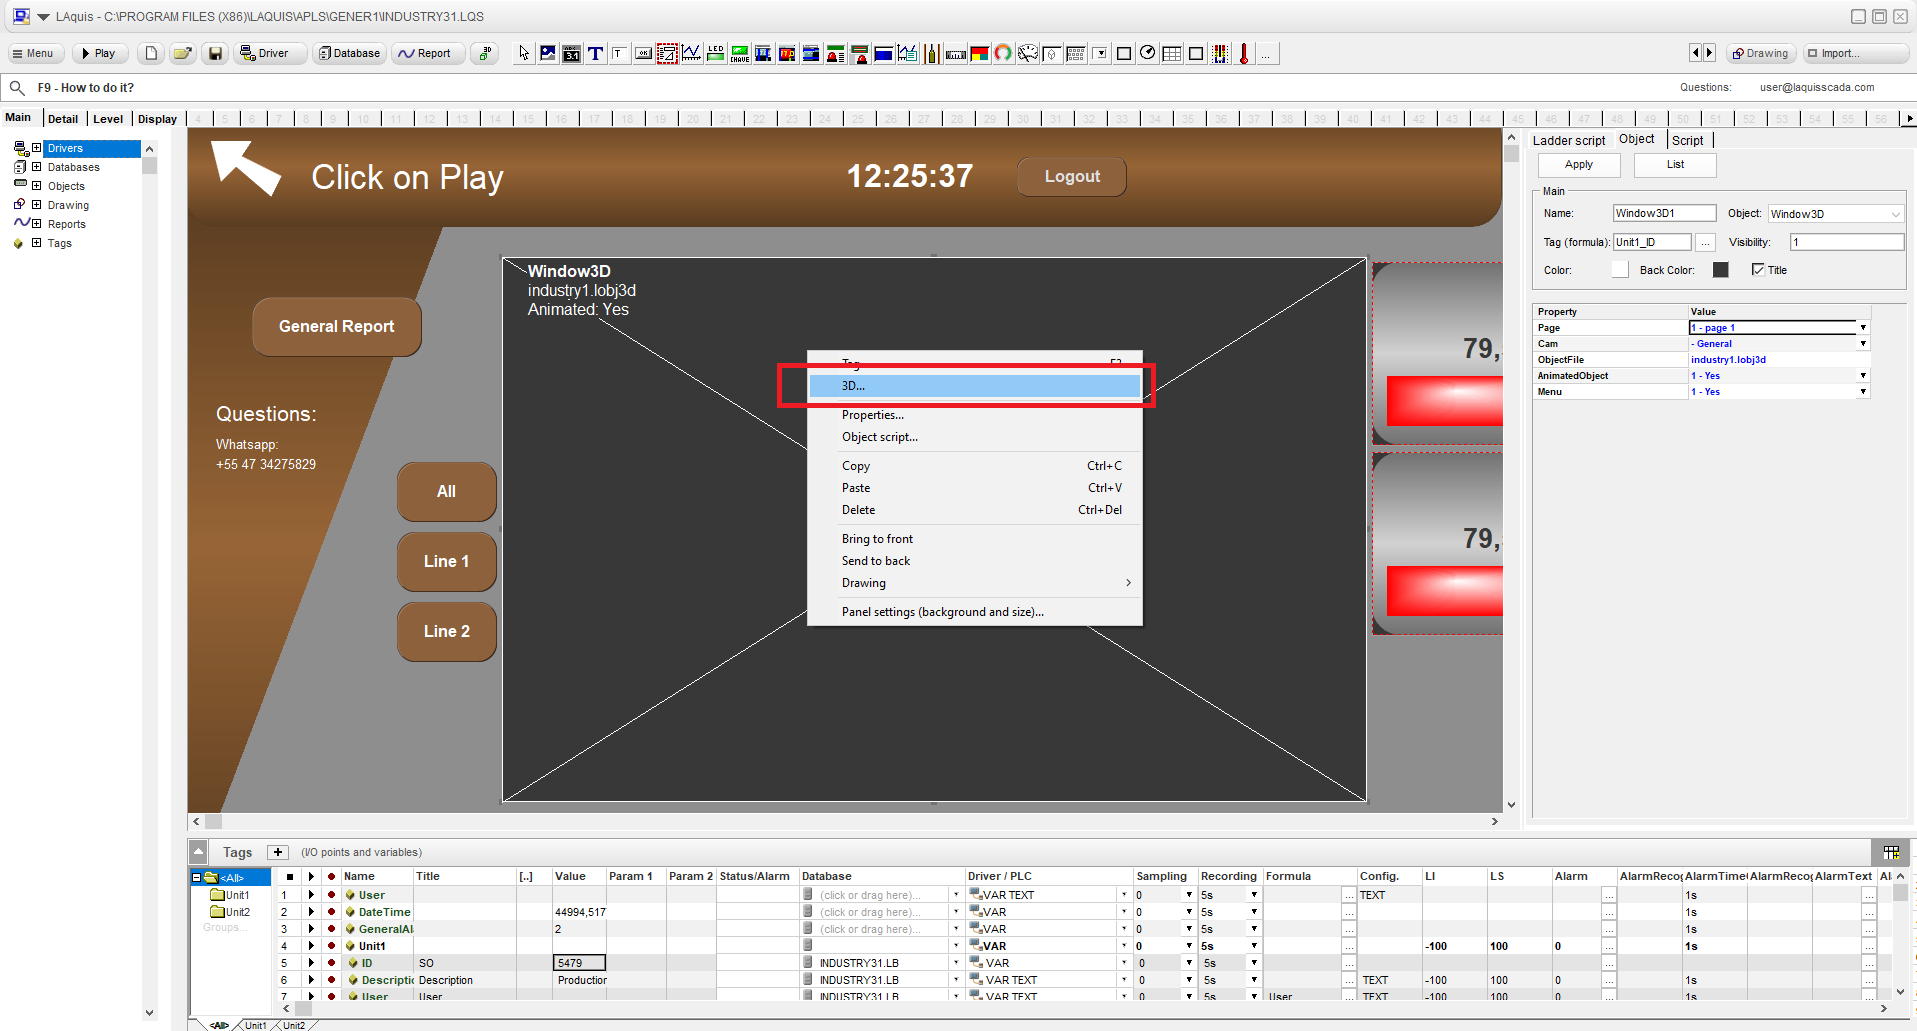
3D options: stop the execution, right mouse button on the 3D Window, and select the 3D… option.
 Edit the 3D file:
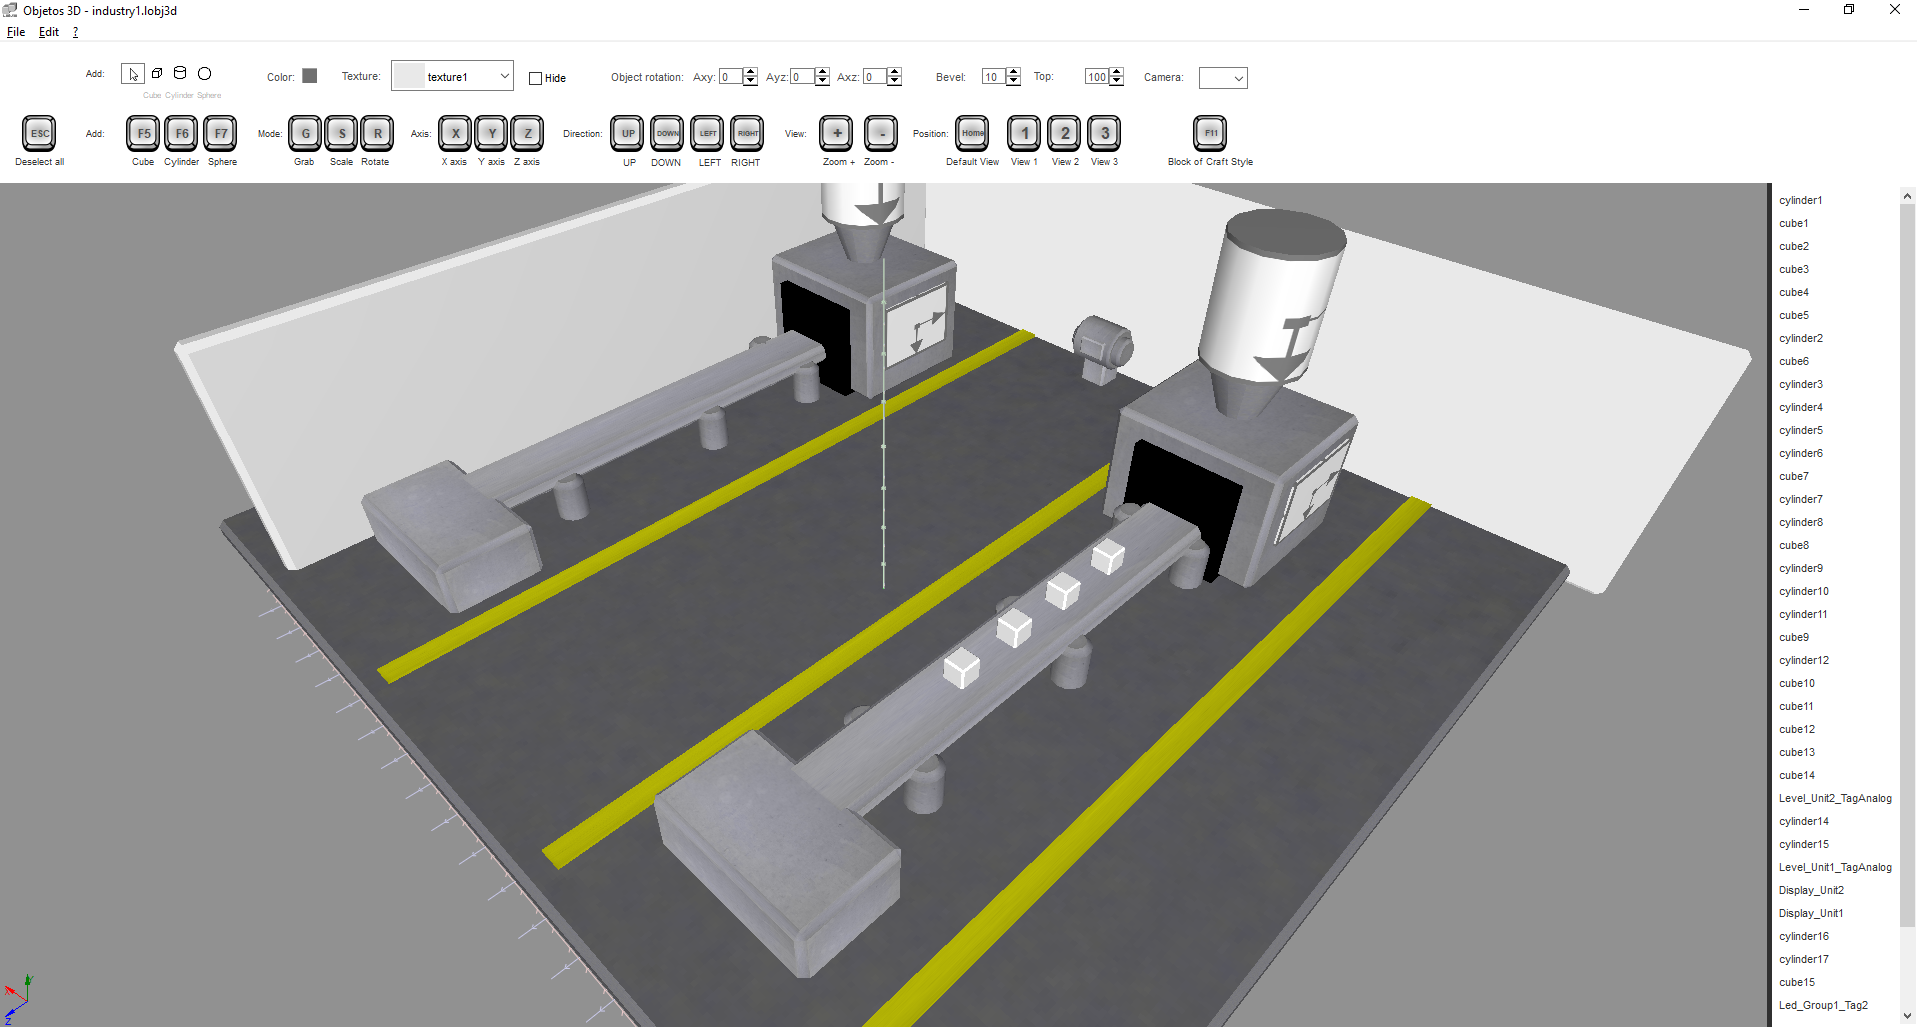
The names of the objects define which panel, group and tag will be replaced in the interface:
Panel_Group_Tag
Panel: name of the visual object panel in the interface.
Group: group of the tags.
Tag: Optionally, the name of the tag, only if it is individual.
Example:
Simple 3D example can be downloaded here:
The 3D more advanced example, with .obj file.
Execute the example application, desktop shortcut “Example 3D SCADA”.
Click on Play button for testing. To stop the application, press F7.
Explanation:
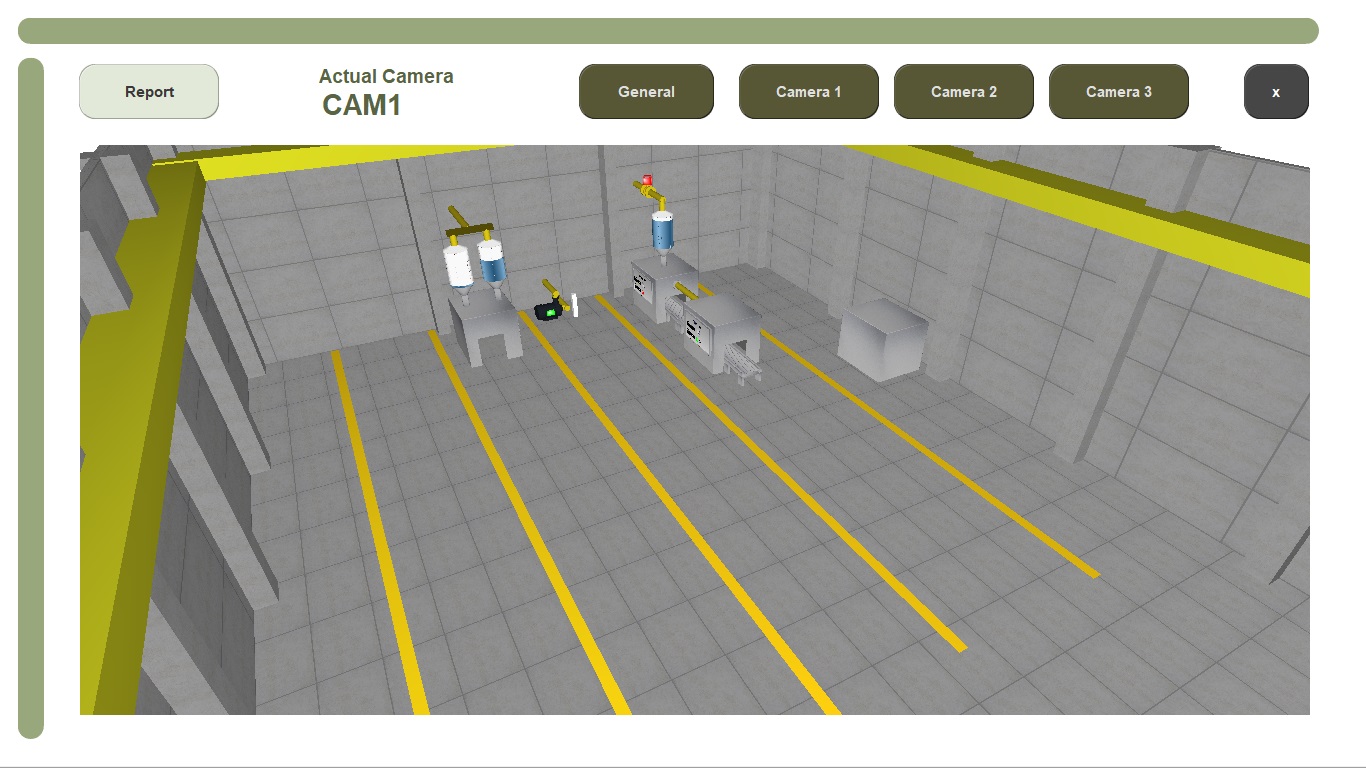
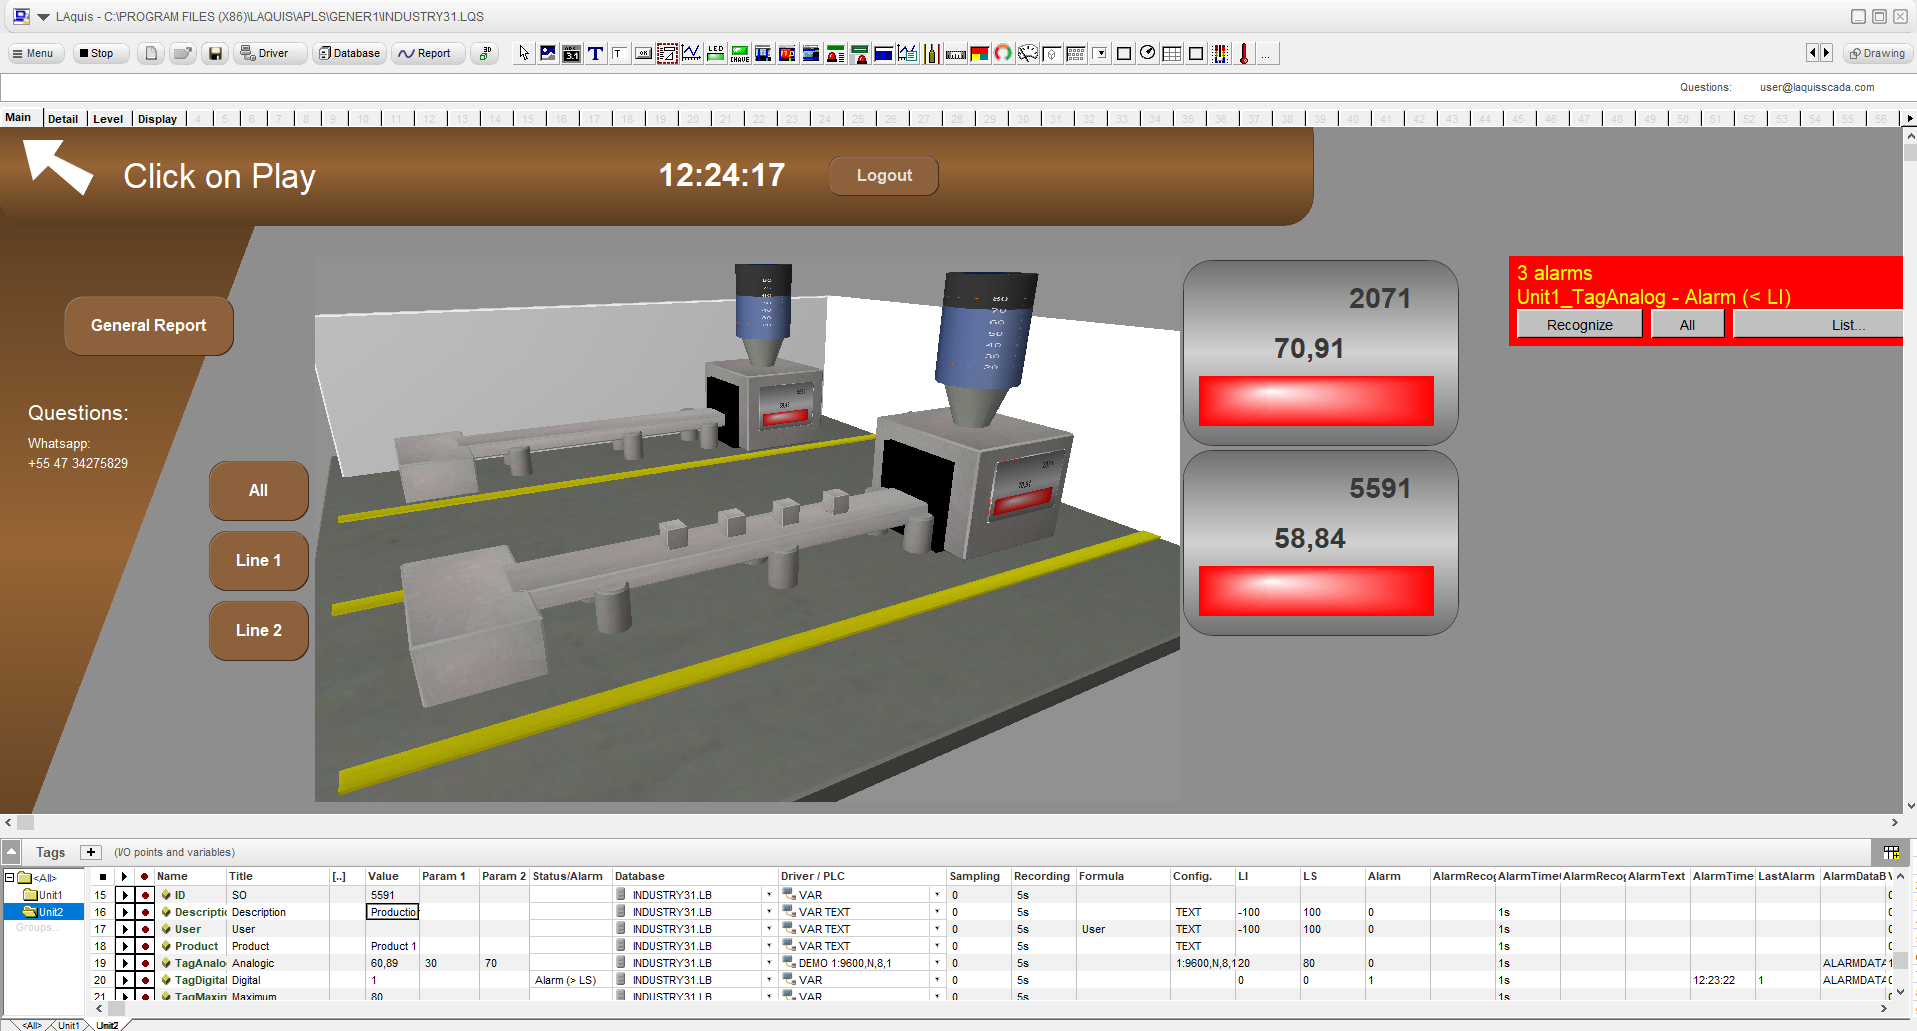
SCADA 3D is an interface, designed in 3D format, of the industrial production factory, explorable and navigable in any position, with real-time data monitoring.
The 3D files, can be made by importing an 3d .obj and .mtl file in LAquis SCADA.
The textures are replaced by the SCADA design, with the panel and groups and tags names. Several cameras positions can be created. Can be on the monitor itself, or, in the future, in virtual reality and metaverse.
First, create an application project with normal 2D design. Then create a 3D interface, and then, integrate with the application project. (Simple generic normal 2D application – Step 1)
In this example, each button from General to Camera 3 selects the pre-defined camera position.
In the 3D view, left mouse button drags the camera or set a new position. The right mouse button rotates the camera.
The report button calls the report normally.
Design explanation of the example:
The used object is the Window3D. Set the ObjectFile property with the name of the .obj 3D file. Set the Cam property with the default set camera name if it is already pre-defined.
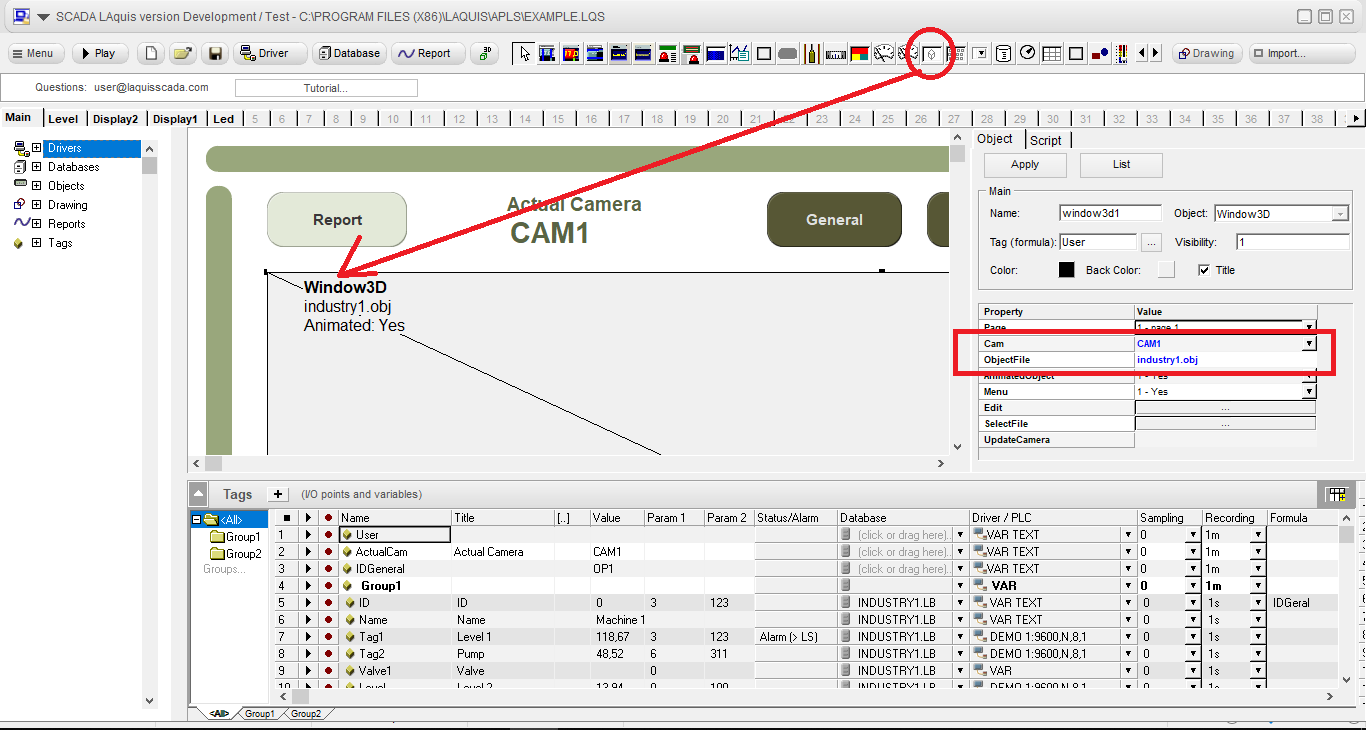
To create new cameras positions click on the 3D button in the toolbar.

Open the obj file, set the position, and then save the camera position:
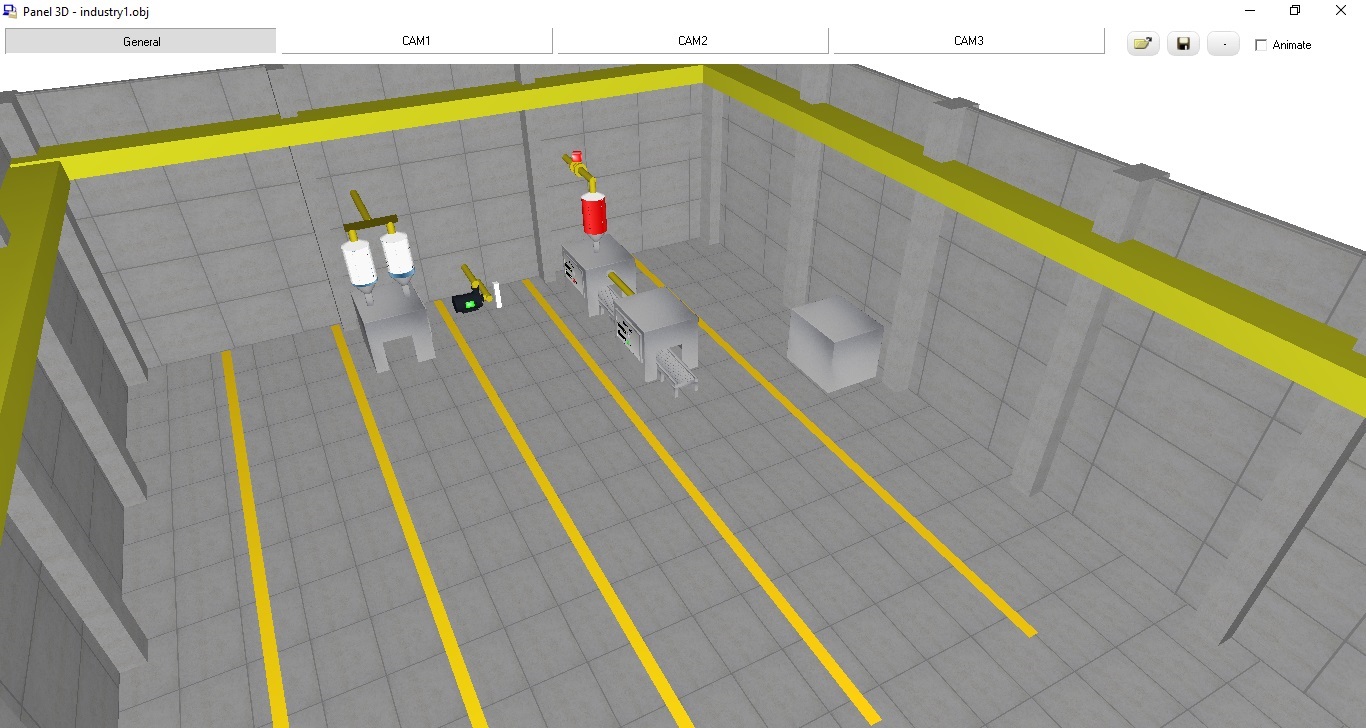
In the 3D view, left mouse button drags the camera or set a new position. The right mouse button rotates the camera. The mouse wheel zooms the camera.
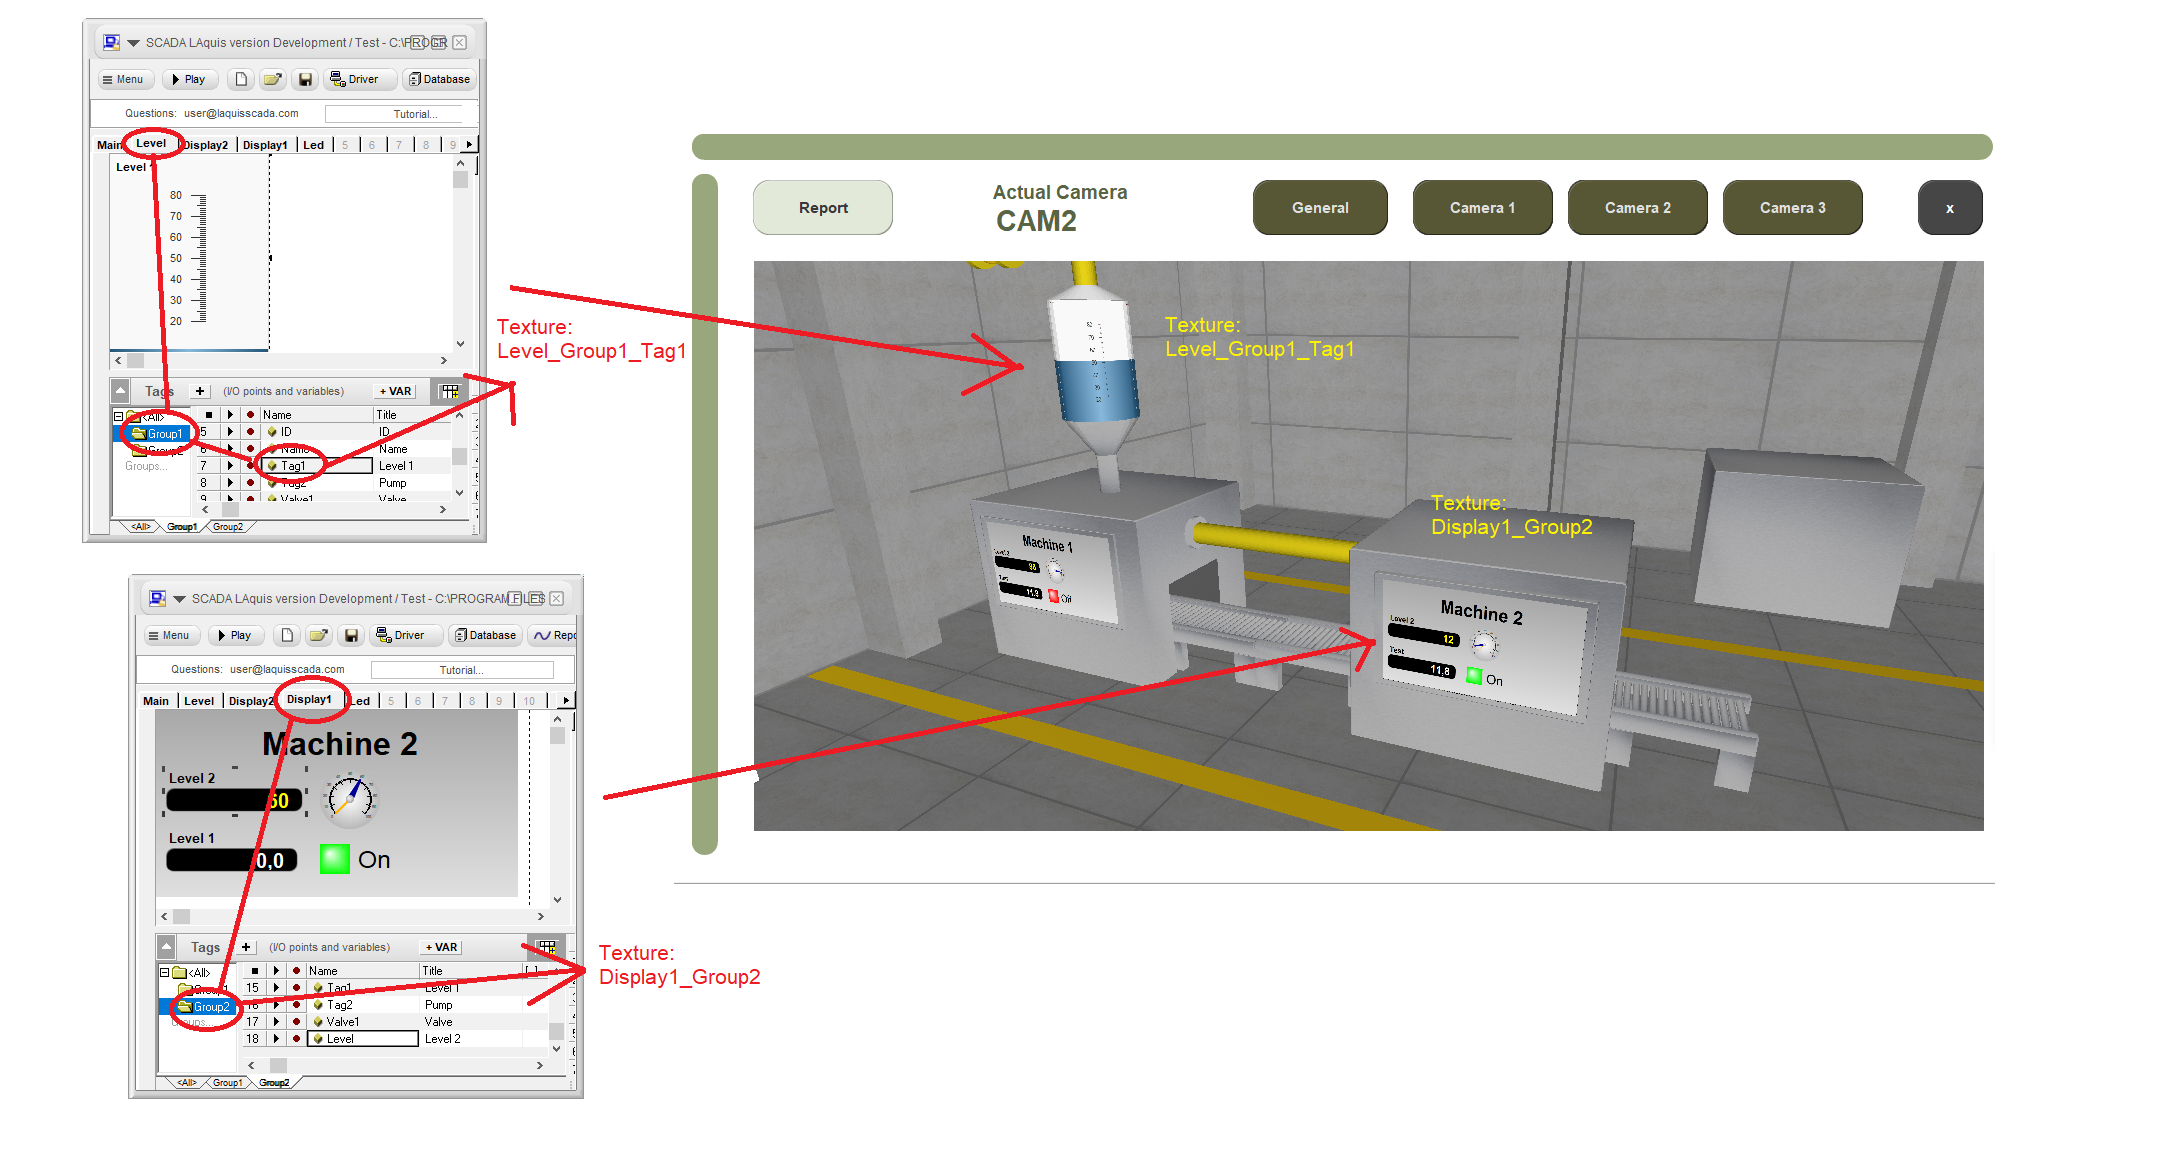
The names of the textures define which panel, group and tag will be replaced in the interface:
Panel_Group_Tag
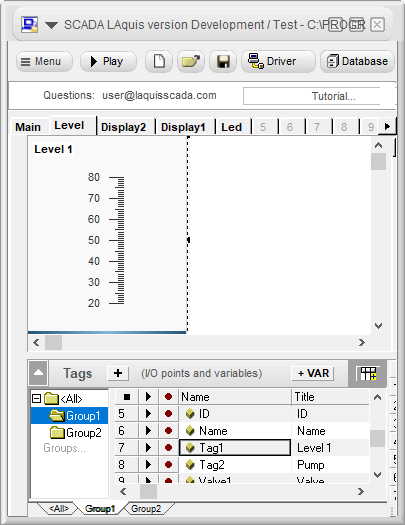
For example, one of the level textures name is Level_Group1_Tag1. Then, the texture is replaced in real-time by this panel Level:
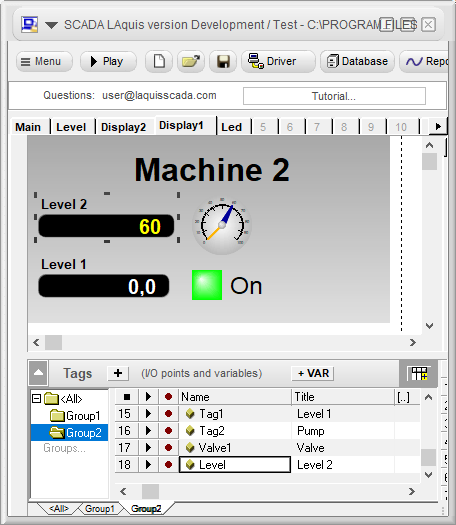
Other texture, was a full group, Display1_Group2. The texture is replaced in real-time by this panel:
Monitoring and navigation on the monitor itself. Then, in virtual reality or metaverse.
Simple 3D example can be downloaded here:
(The 3D file source file is also in the folder with the ancient Blender format version 2.79. To export to .obj and .mtl, also turn on triangulate faces and use Blender Render. )