Let’s create a SCADA generic application with 7 basic steps.
1 – Definition of tags 
2 – Visual objects. 
3 – Panels. 
4 – Database and reports. 
5 – Database of alarms. 
6 – Registrations. 
7 – Report by ID.
Step 1: Definition of the tags.
The tags are the IN, OUT and variables points.
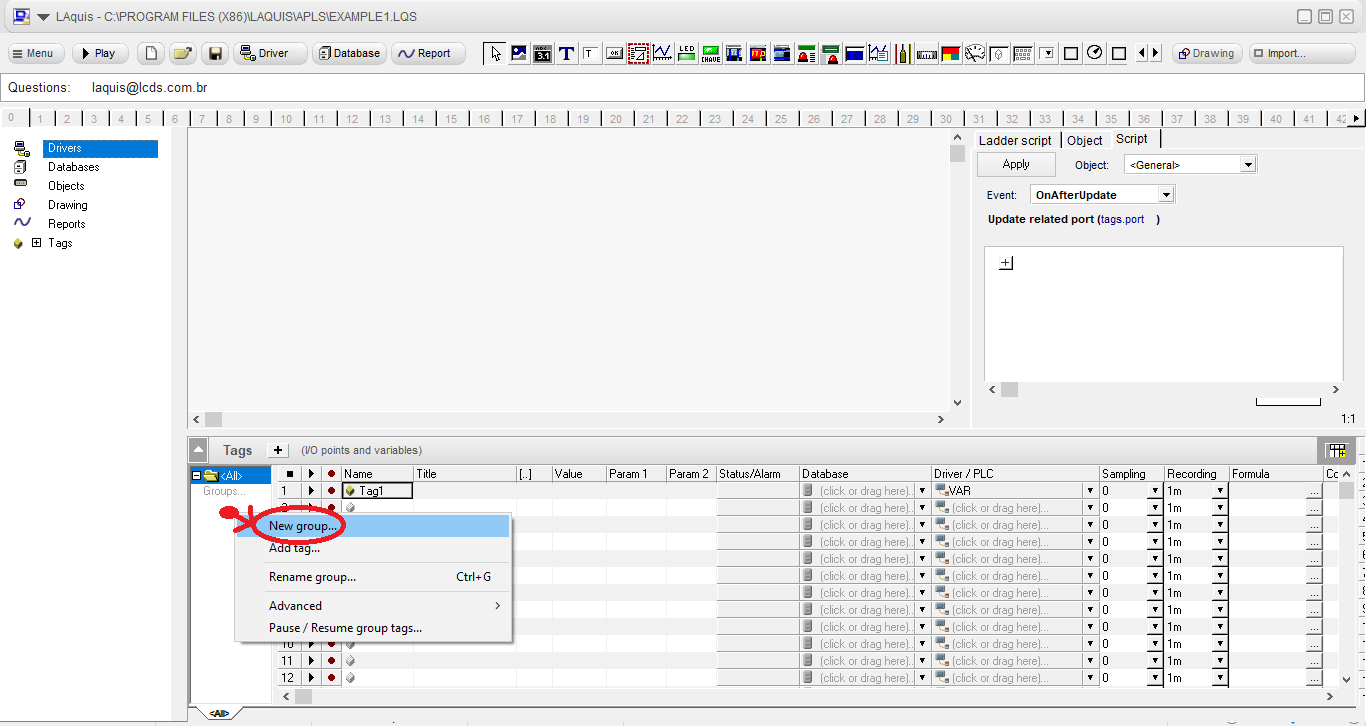
Initially create a Group of tags by clicking with the right mouse button directly on the groups window, menu New group.
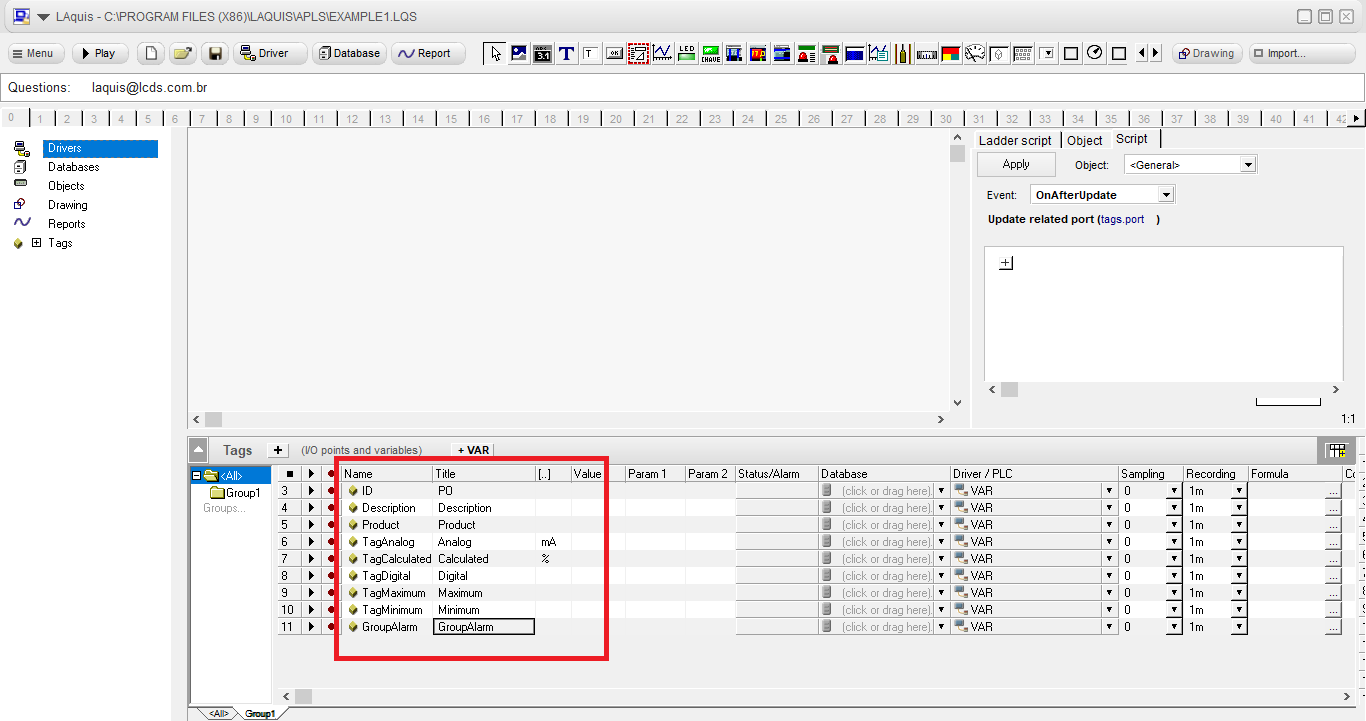
Then click on the + VAR button to create the tags, for example, like this:

Define the names of the tags, their titles and their units.
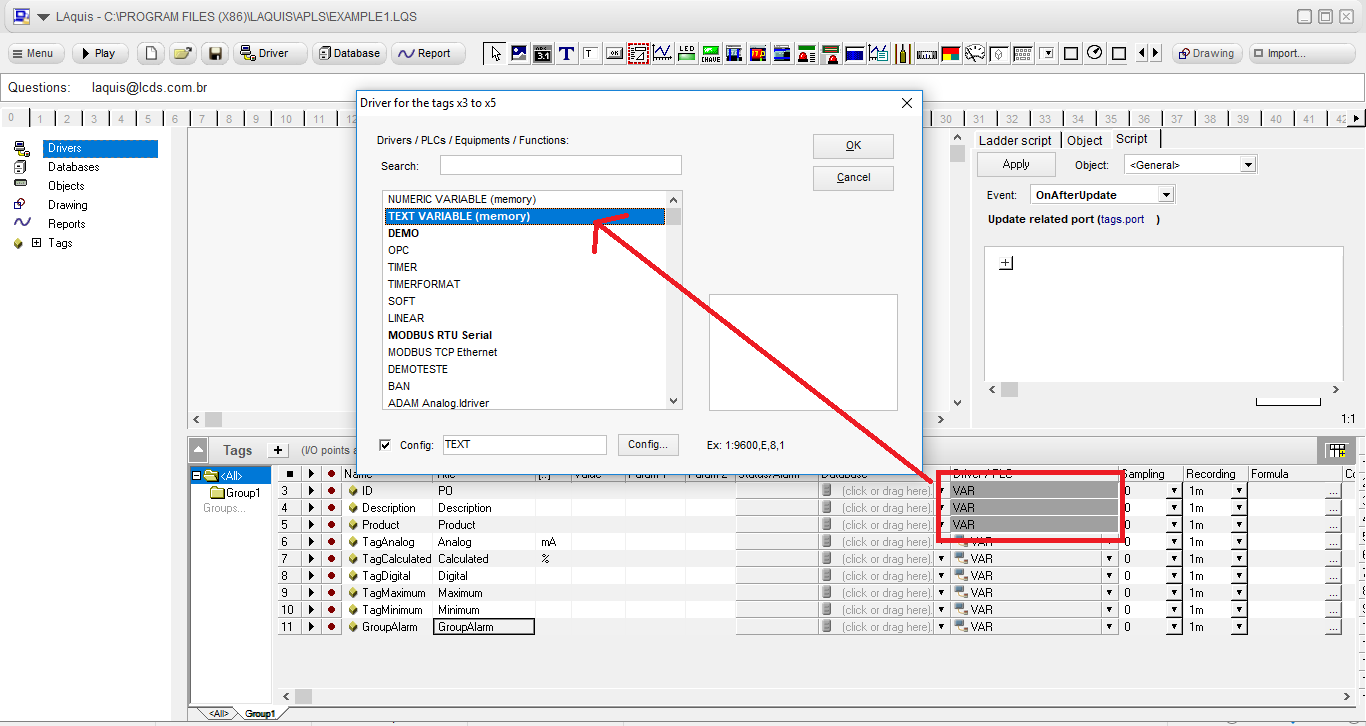
These first three tags, we will consider as text variables. To do this, drag the mouse with the right button on the cells of the Driver column and select the VAR TEXT driver as follows:
Let’s select this TagAnalog as a DEMO driver. This time just click on the Equipment cell (driver) equivalent to the TagAnalog tag and select the DEMO driver like this:
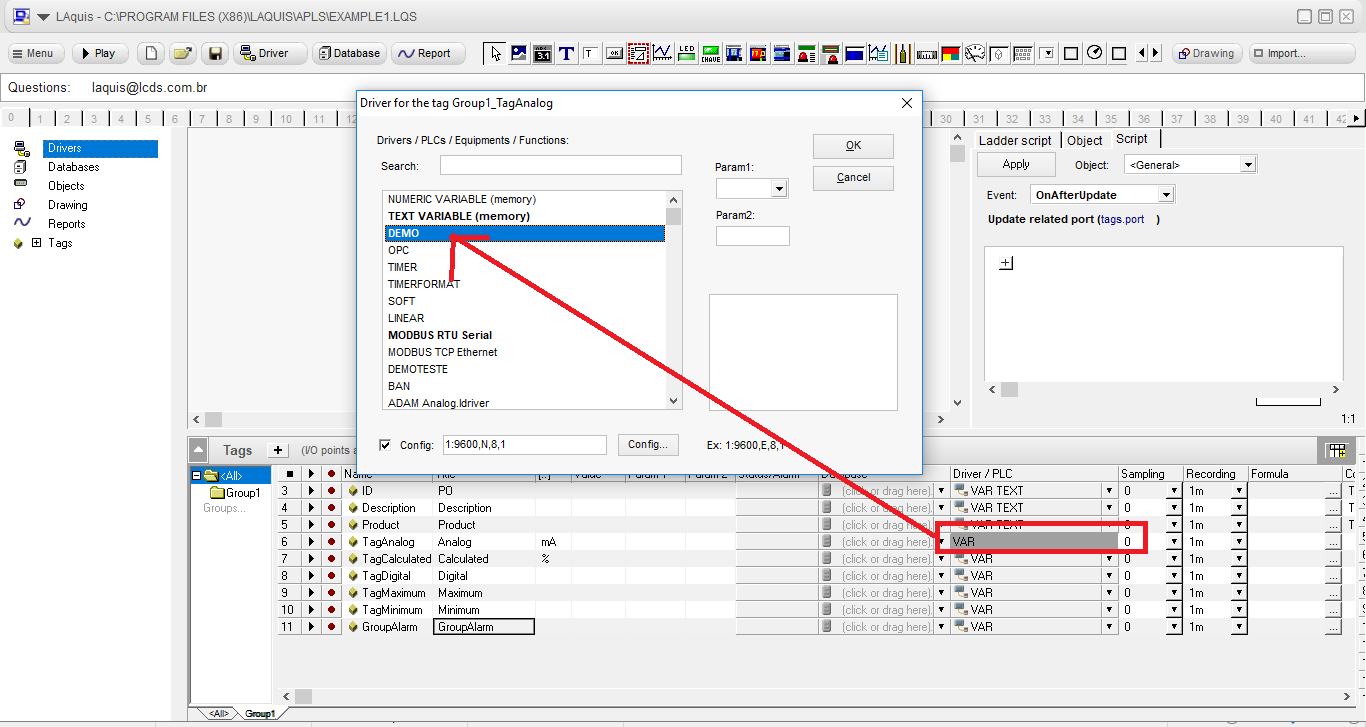
The parameters in the Param1 and Param2 columns are the addresses and settings of the driver variables. In this case, it is the minimum and maximum value of the simulation variation.
This DEMO driver varies from Param1 to Param2. In this case we will put 4 to 20 like this:

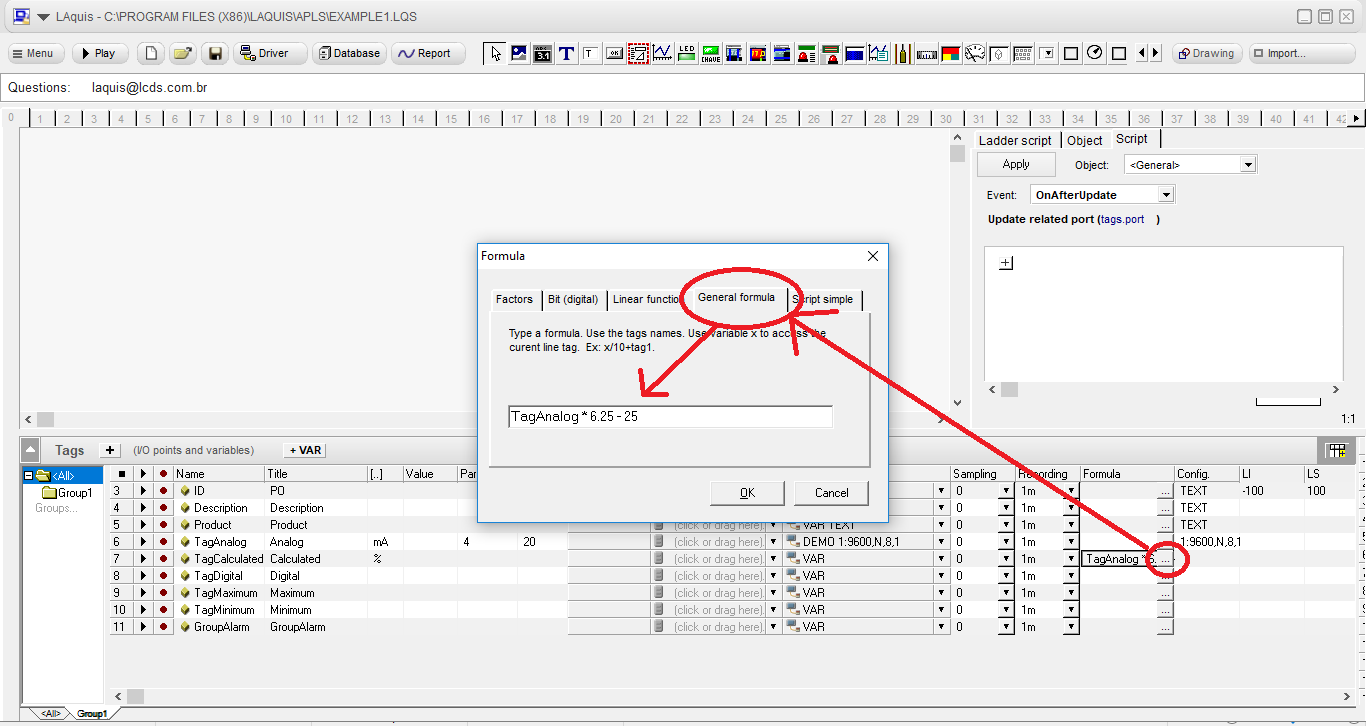
Formula:
In this example, in the TagCalculated tag, which is a VAR (numeric variable), we will put a formula. This formula can use the same tag and / or other tags if you want. There are several types of formulas. In this example we will put the formula:
TagAnalog * 6.25 – 25.
Click the button next to the cell in the Formula column of the TagCalculated, select the General formula tab and type the formula like this:
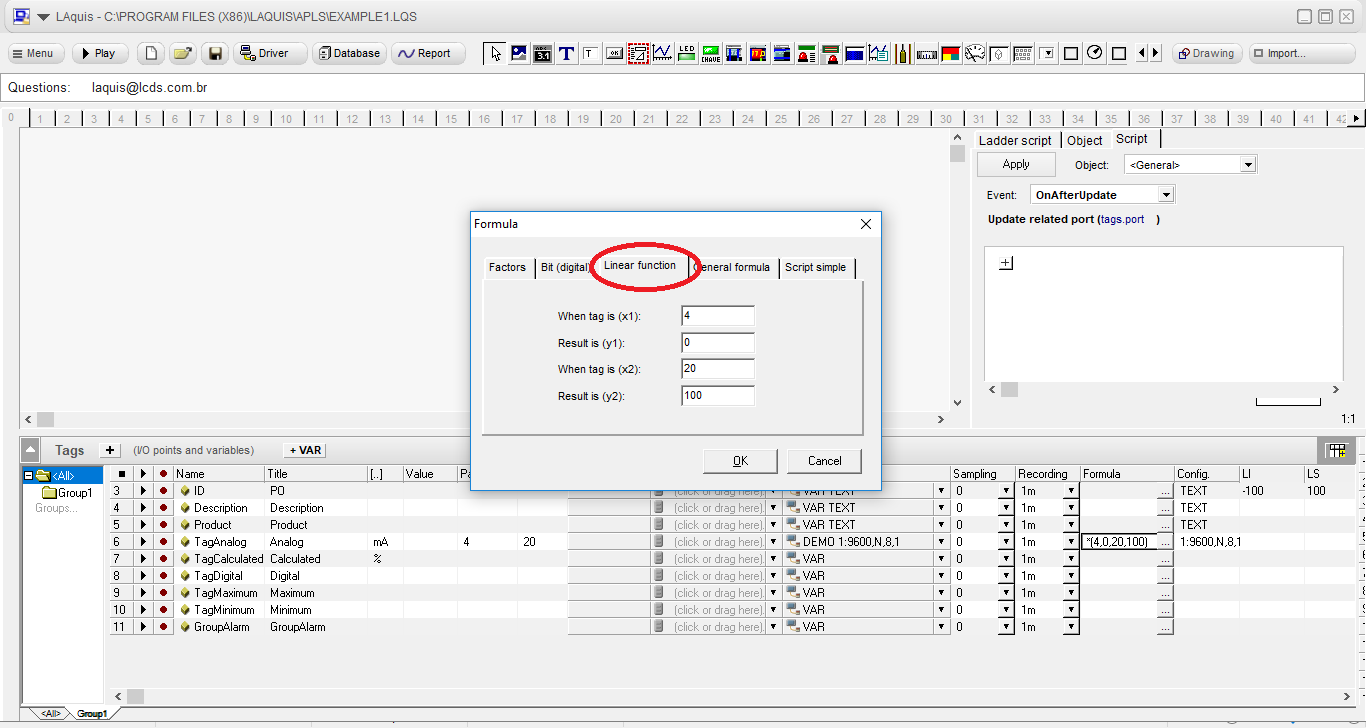
This formula property has several other options and can be used for several cases, for example, you can alternatively in this case put a linear function in the TagAnalogico itself already converting to the value you want like this:
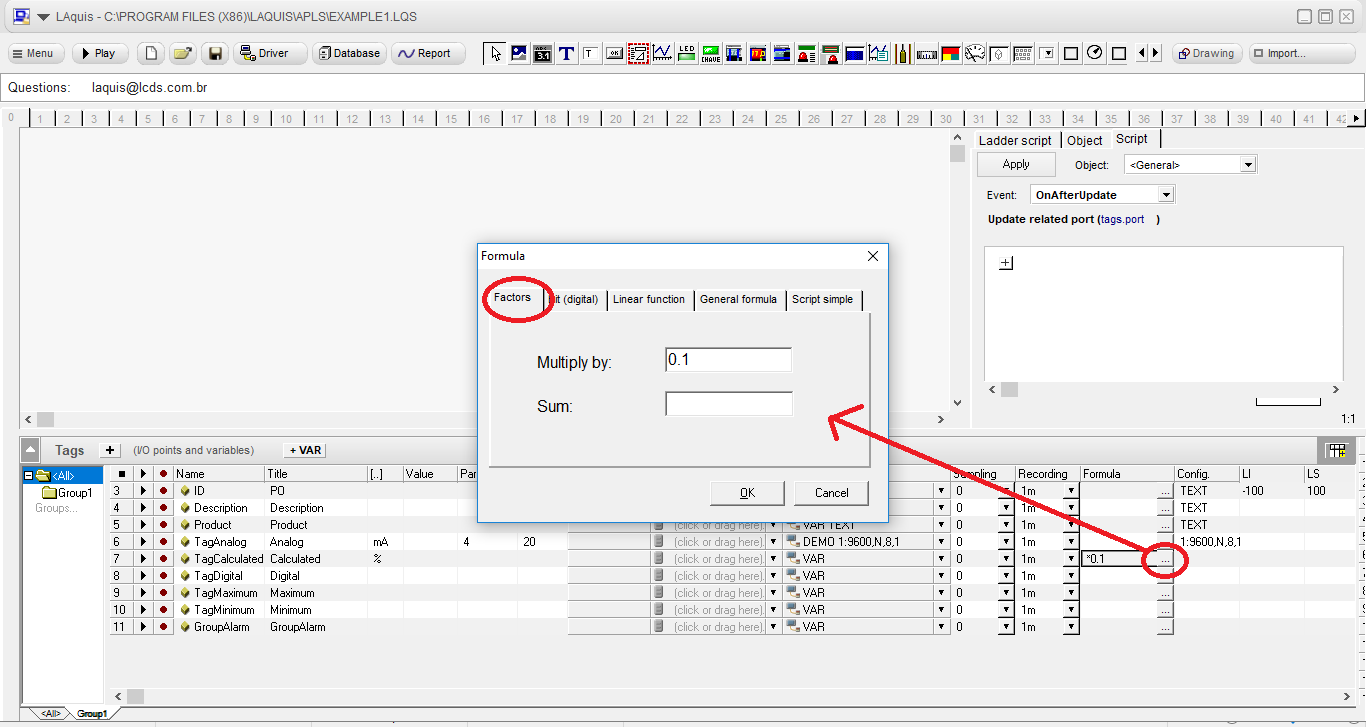
If you just want to add a multiplicative or additive factor, both for reading and writing, you can use this:
If you want to get just one bit, you can do it like this:
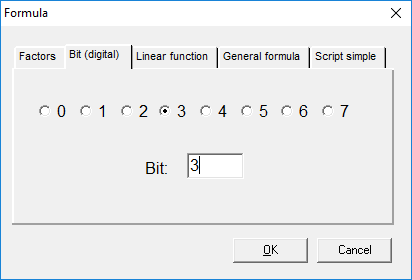
If you want to use the value of the tag itself before calculation, use the variable x

But, in this example, we will keep the TagAnalog formula empty, and we will put the formula only in TagCalculated like before.
Alarms:
Important properties are the limits that are one of the alternatives for generating alarms automatically.
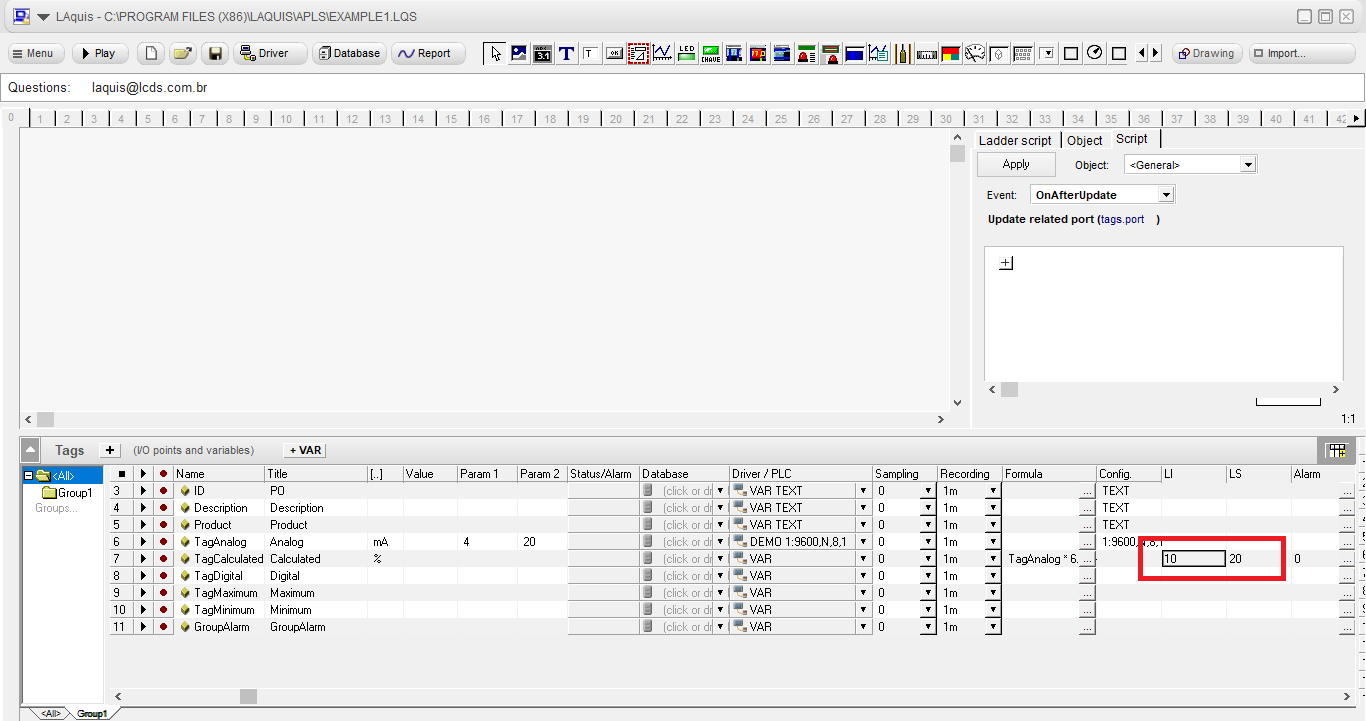
We can, for example, in LI, which is Limit Inferior (lower limit), the value 10. And in LS, which is Limit Superior (upper limit), the value 90. When the tag value exceeds these limits, then the alarm will be activated for this tag. (More details about how to configure alarms: Alarms – How to configure Alarms )
The alarm value, when it occurs, is replicated in the Alarm column property. And the alarm description is placed in the Status / Alarm column property. These descriptions and statuses can be configured by clicking on the Status / Alarm column.
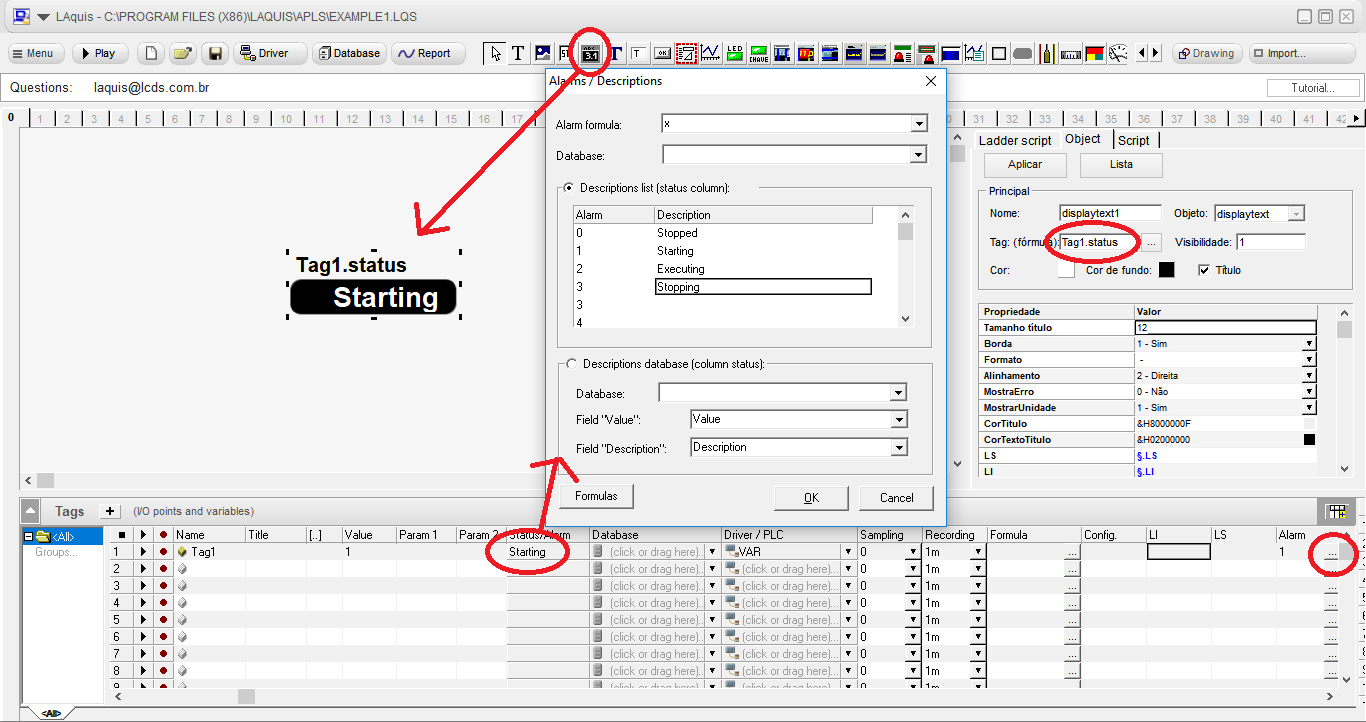
Optionally, if any tag is actually a numeric state, for example, 0 – Stopped, 1 – Starting, 2 – Running and 3 – Stopping, then click on the Status / Alarm property and place the descriptions. Then associate it if you want a display with his tag.status. The LS and LI columns must be empty if the is no alarm associated.
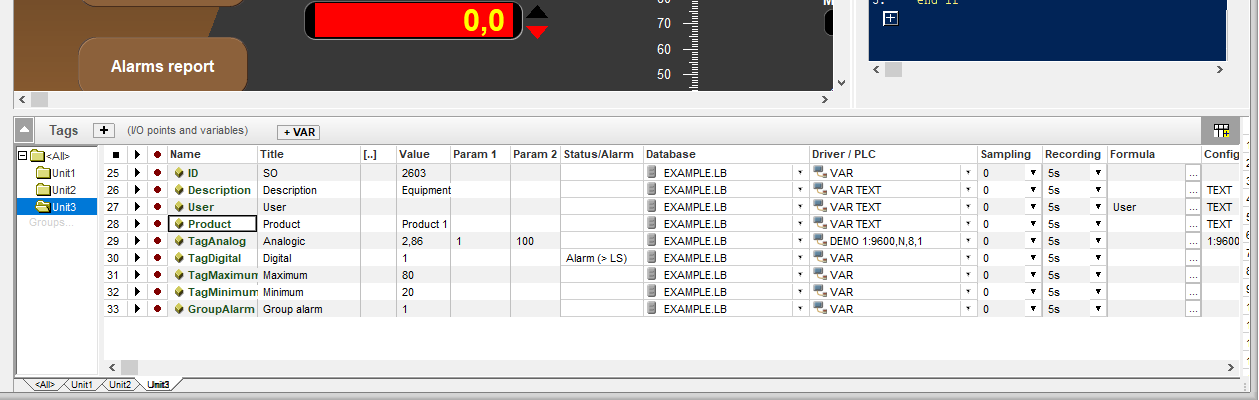
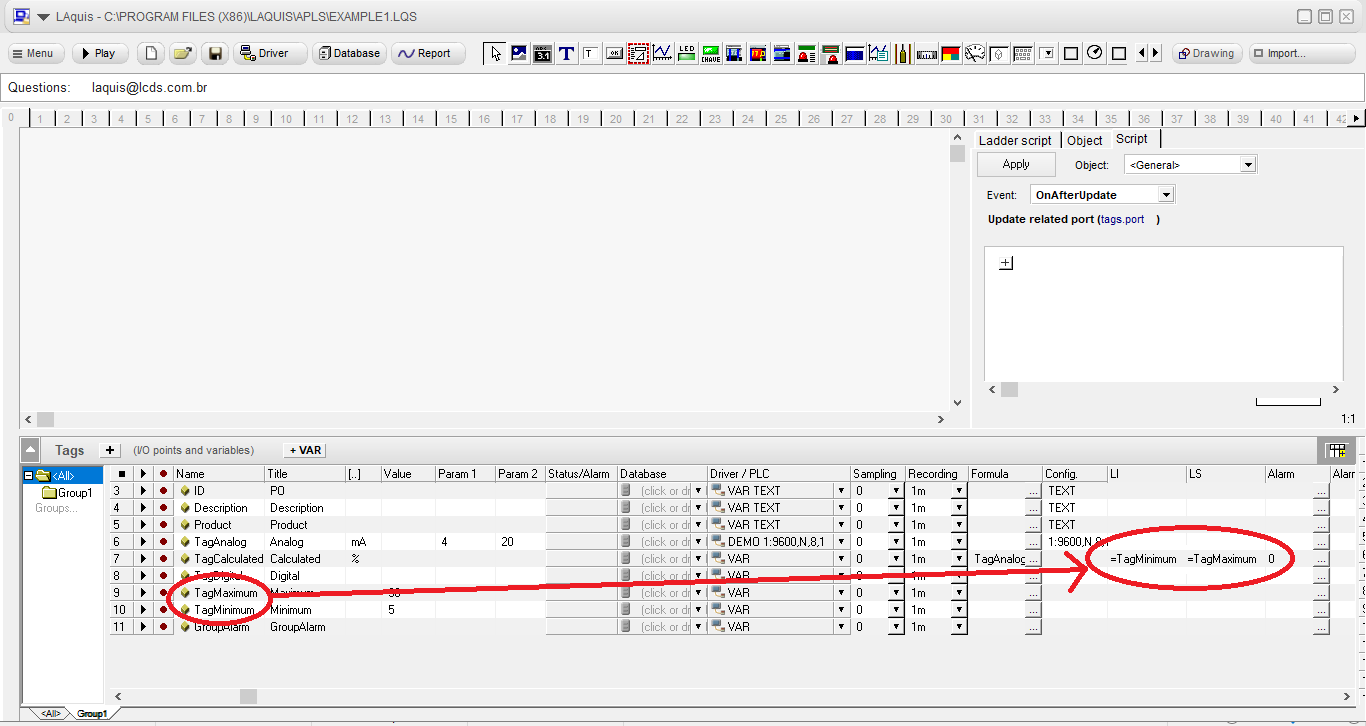
But, going back to the example, let’s associate these LI and LS to the TagMaximum and TagMinimum tags. Put, for example, the values 90 and 5, only initially, in the TagMaximo and TagMinimo tags. Then, in the LI and LS properties put = TagMinimum and = TagMaximum as shown below. It associates the tags of this name that are in this group, only when it is running.
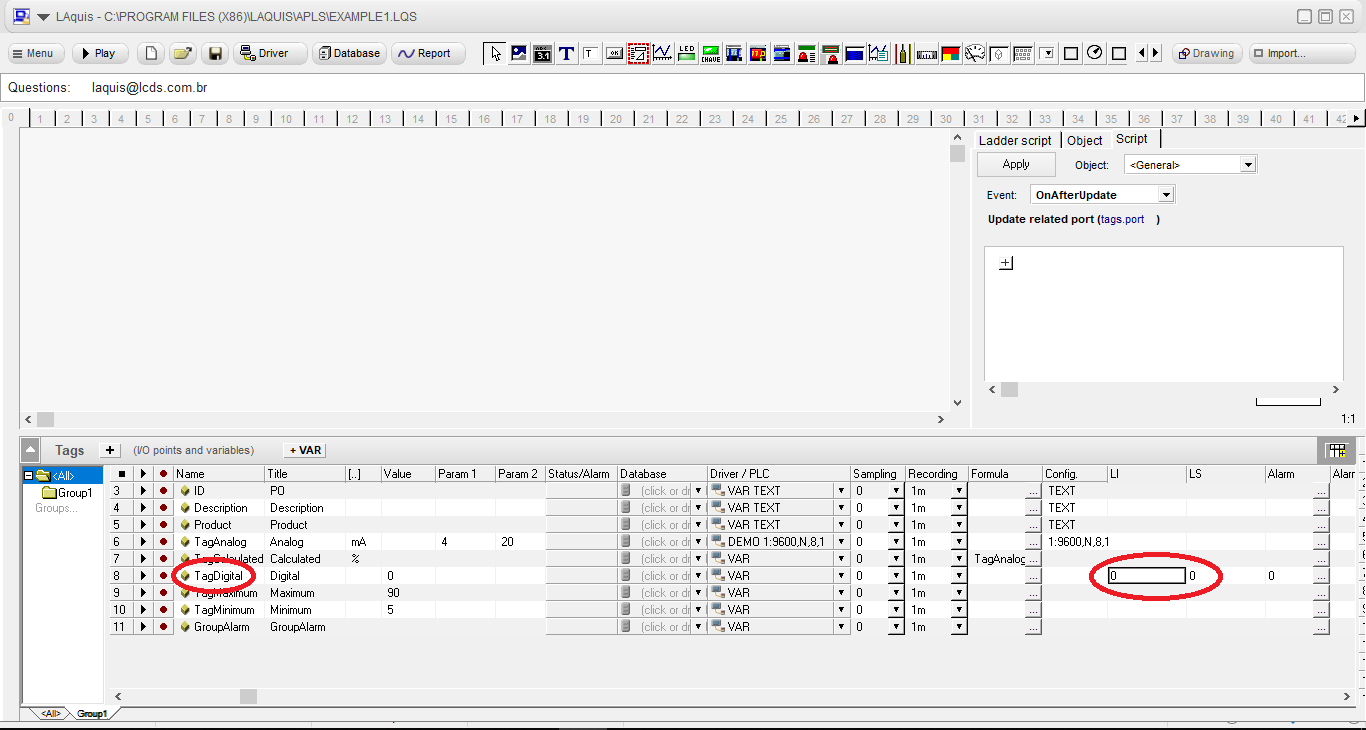
If a digital tag is actually an alarm, then set the LI and LS properties to 0 and 0. When the digital tag is 1 then it turns on the alarm. In this example it looks like this:
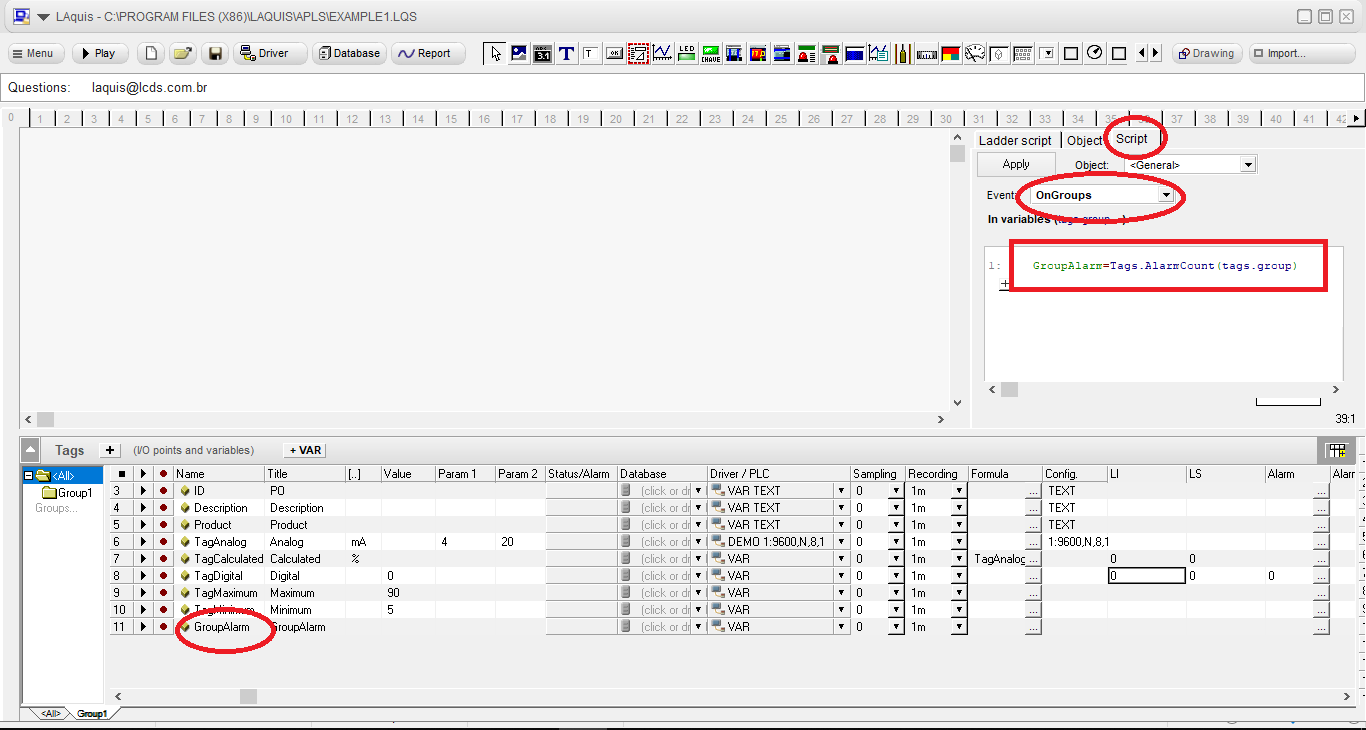
If you want, you can generalize the alarms by counting the number of current occurrences. In this example you can use the script and the GroupAlarm tag like this, if you want:
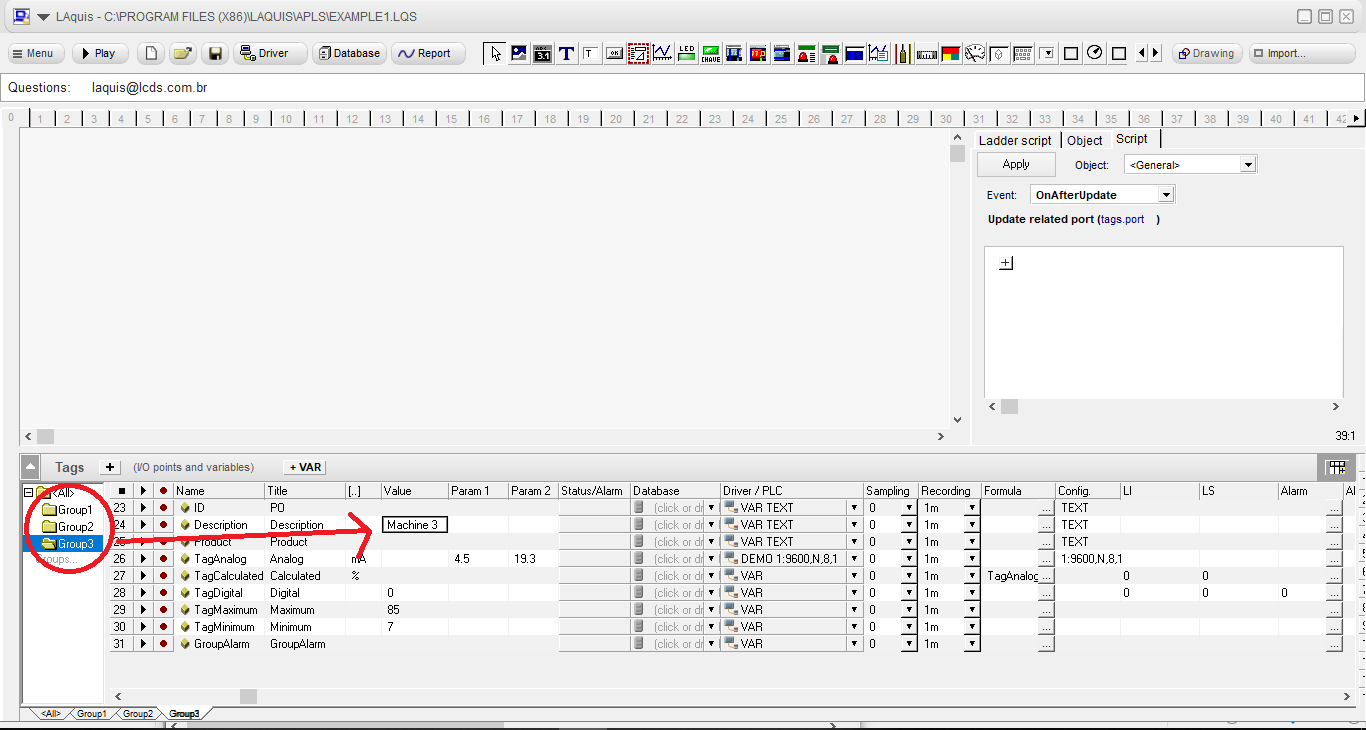
Replicating groups:
We will then place more groups replicating the current one. This occurs in practice when several units or machines or equipment have more or less the same types of tags.
To replicate, right click on the group in the groups window on the left, select advanced groups, duplicate group.
Then fill in the parameter values for each group. In this example, description tag, Param1, Param2, TagMaximum and TagMinimum.
Next step (Step 2)