Generic application – Step 3 – Screens / Panels
We will create several panels for the user to access the information in different ways.
(Previous step, Step 2 )
First click on the panel 0 tab with the right mouse button, select the Rename option and type Detail. This panel will detail each group. This page will then be automatically associated for each group, without having to create a screen for each one.
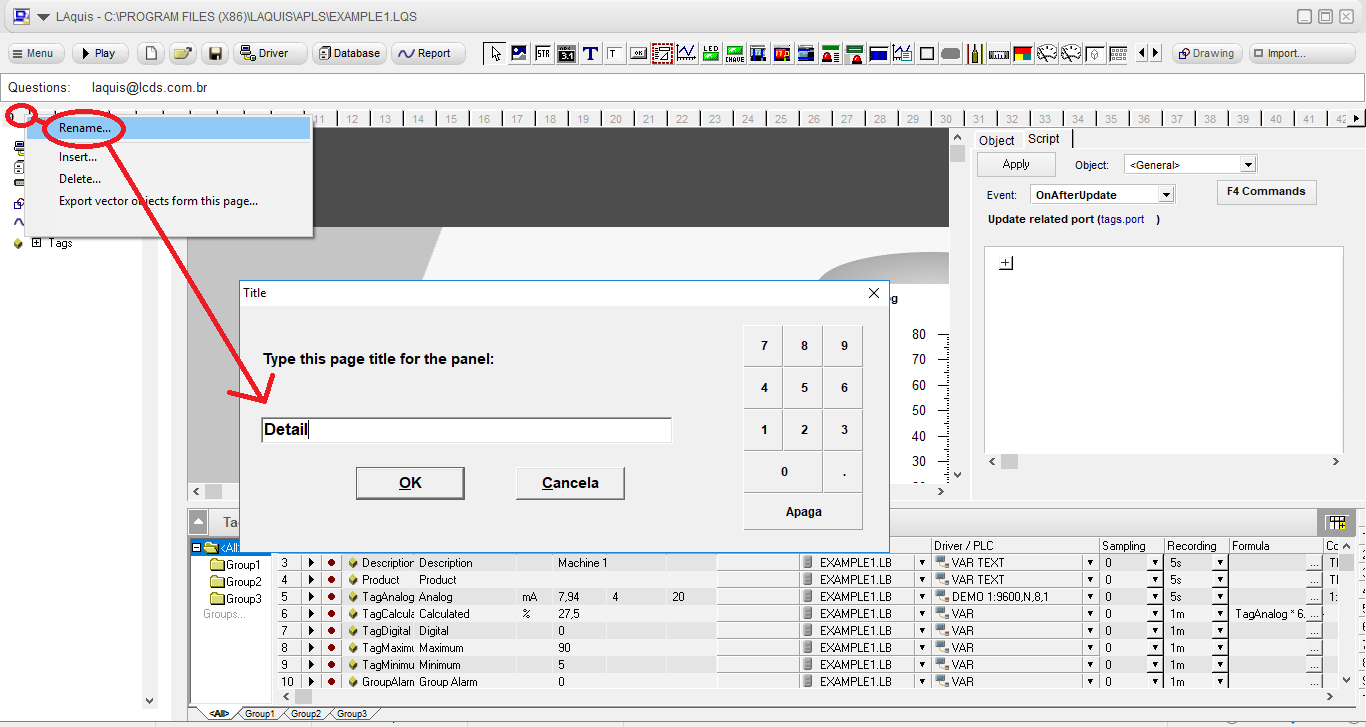
Go to the first page, right click on the first tab and insert a panel.
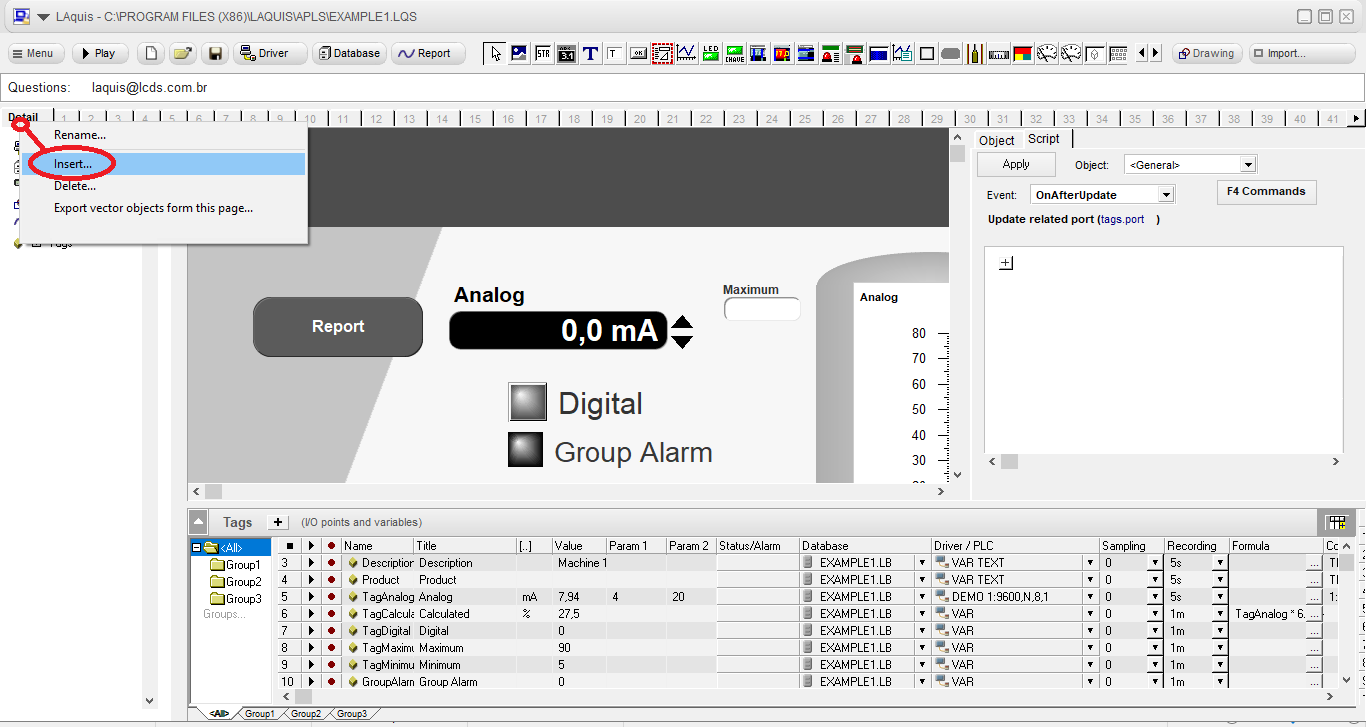
Rename this panel with the name General.
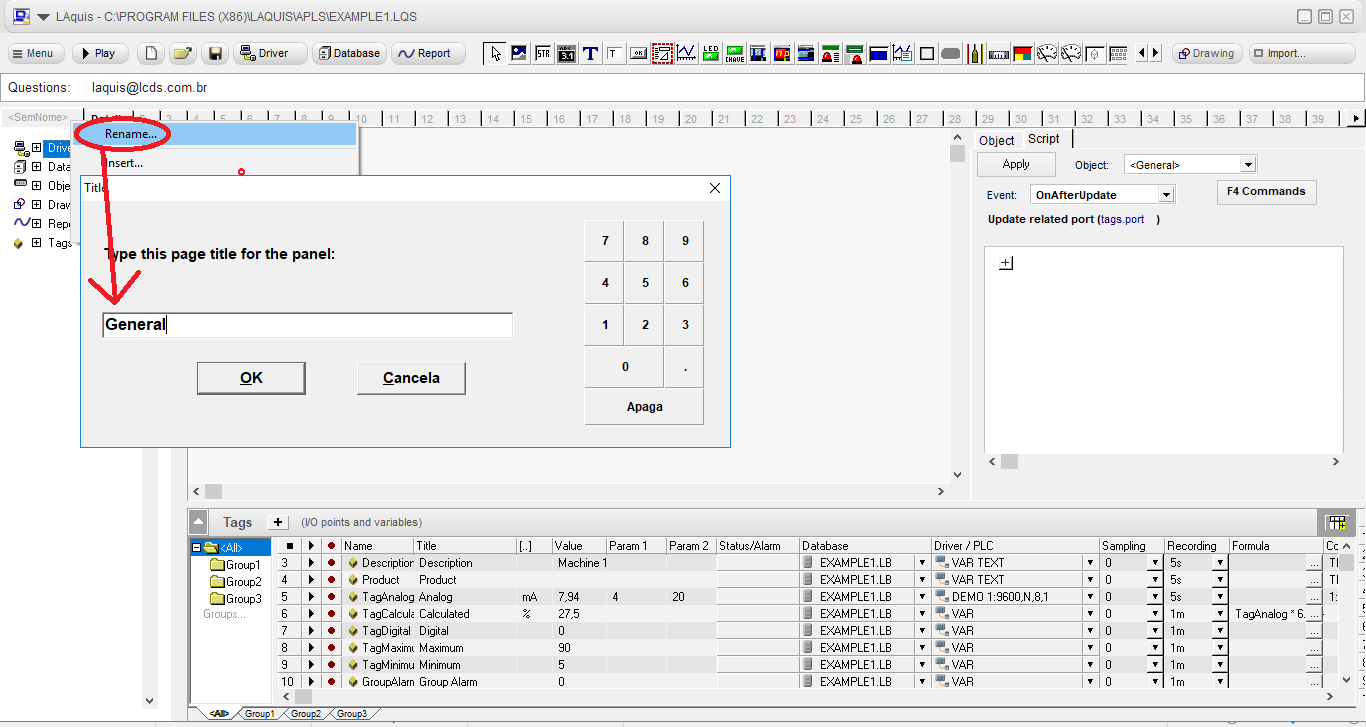
Then rename the third tab to Display.
In this third panel, which will be a display, we will put, for example, a summary of the group data.
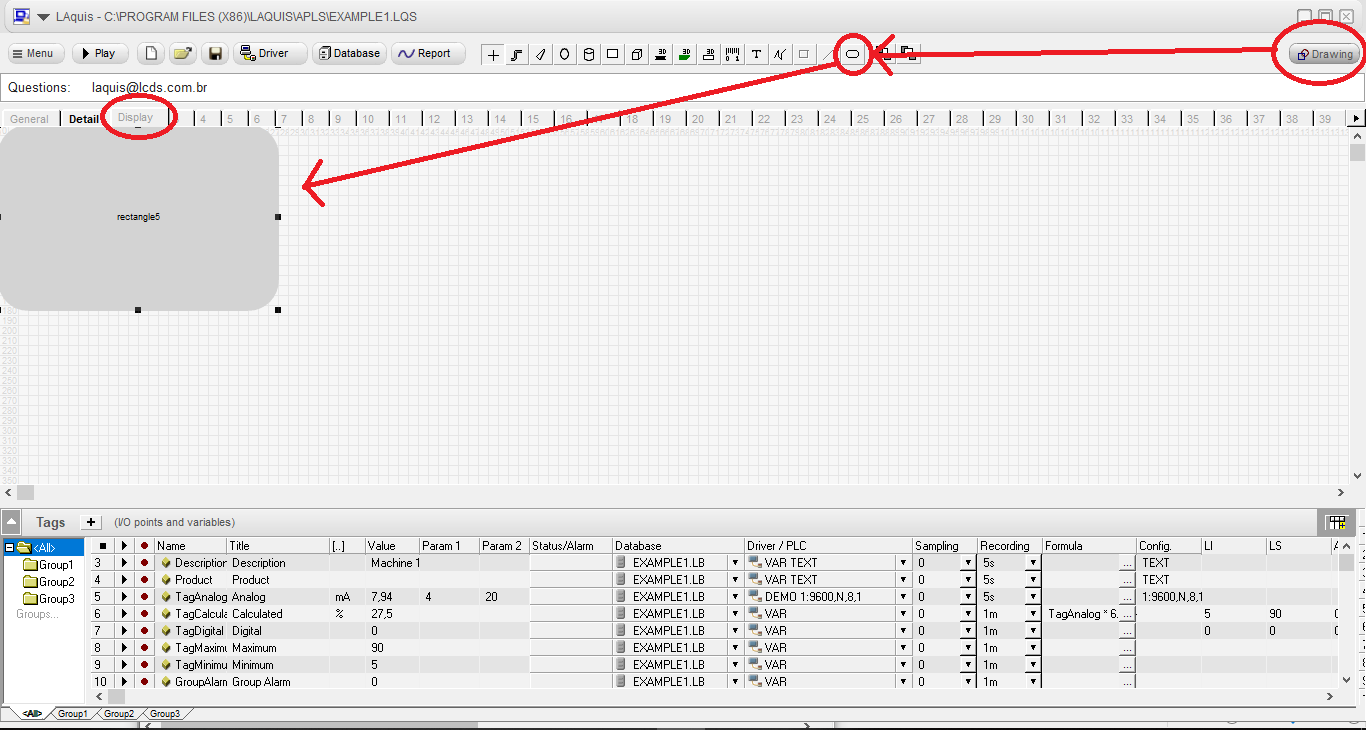
To define a background for it, click on the Drawing button and place, for example, a rounded rectangle like this:
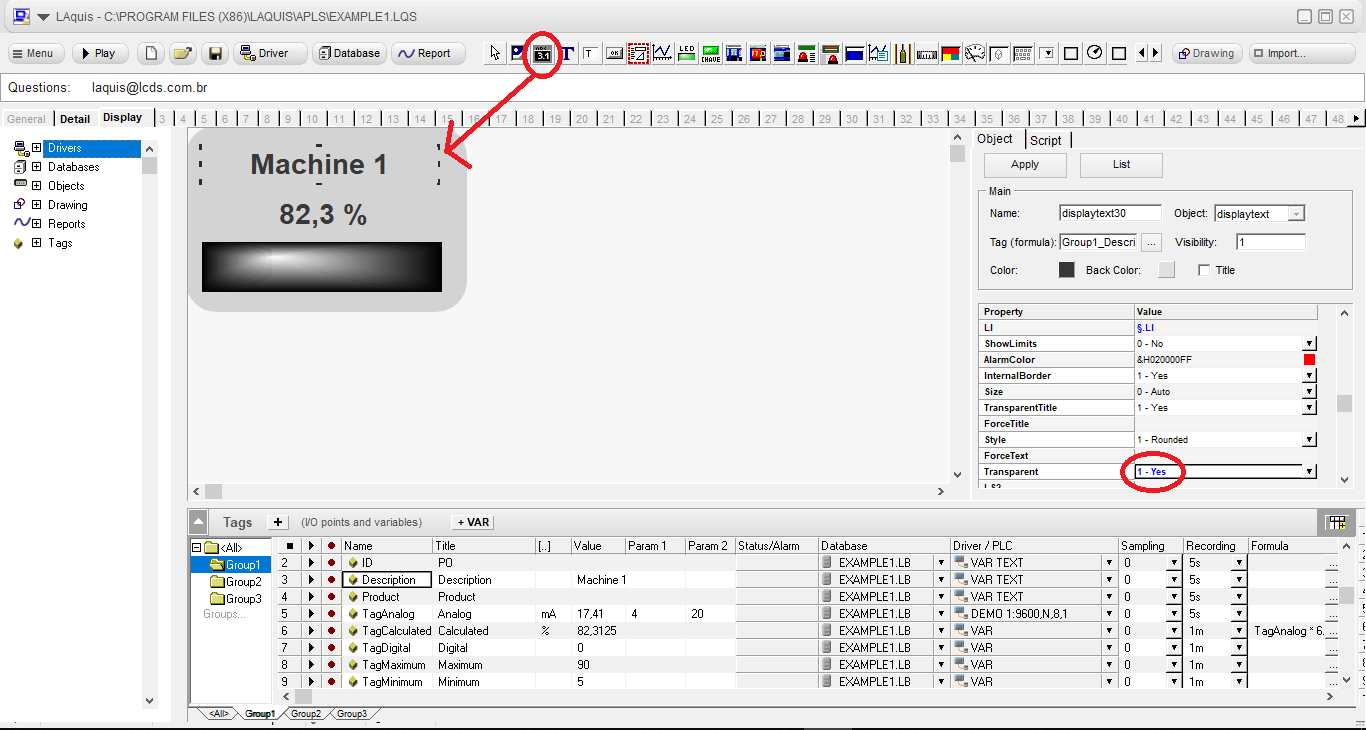
We will place a transparent displaytext object associated with the description of the group, which in this case is the Description tag. If you want, put the led for the alarm and a transparent displaytext to show the TagCalculated, if you want:
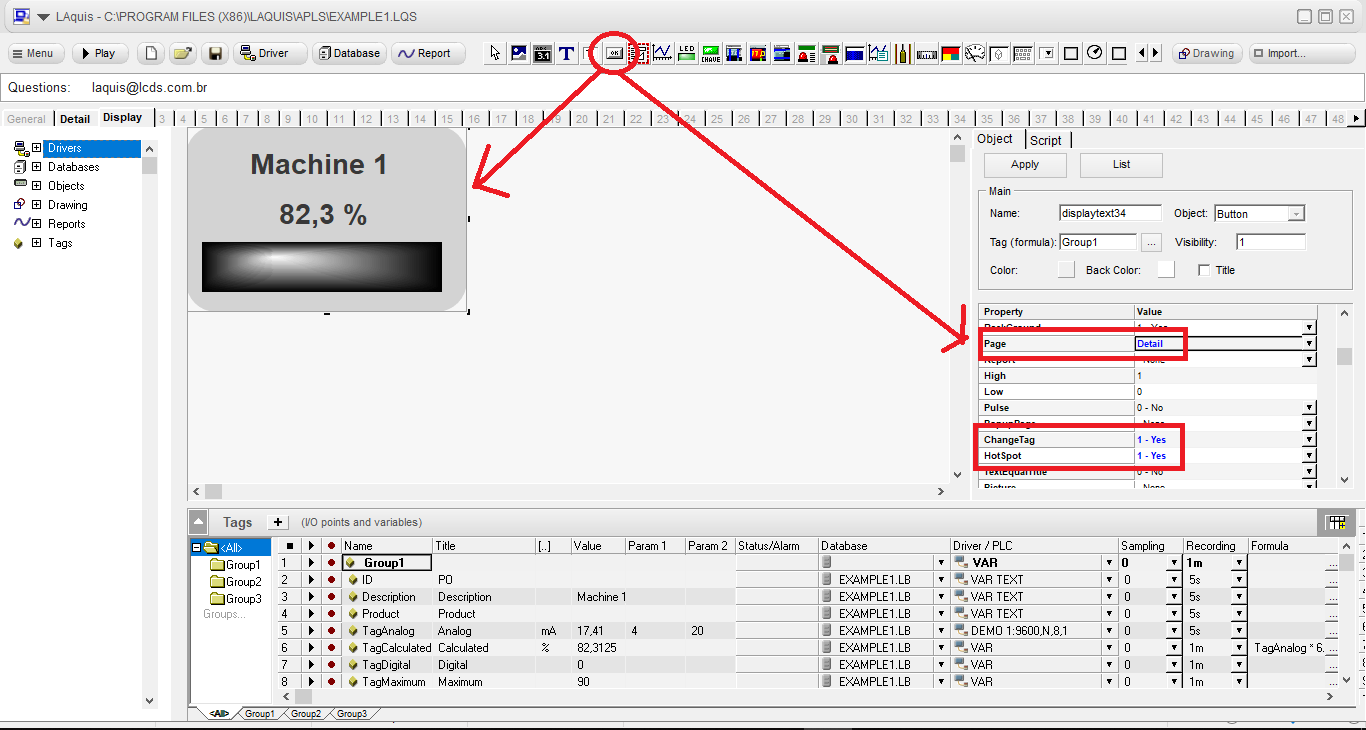
Then, place a button, in the hotspot format, that is completely transparent. In the Page property of the button, it associates with one of the group names, in this case Group1. Then in the Page property, enter the page name of the Detail panel. And in the ChangeTag property, set it to 1 (yes) Then, on execution, when the user clicks on this button, which in this case will apparently be the display, then the page panel will automatically be selected. The edition looks like this:
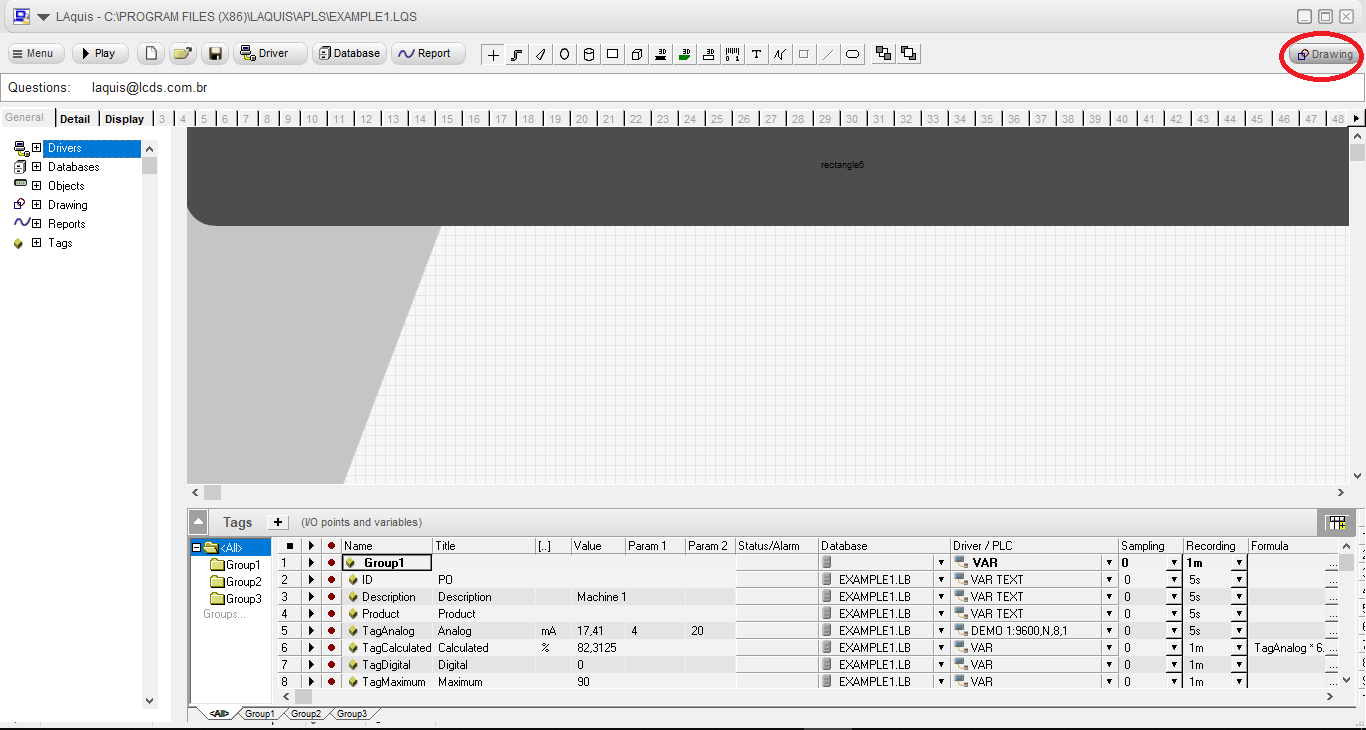
Then go to the Detail page, click on the Drawing button. Mark all vector objects, copy, then go to the General page and paste to look the same:
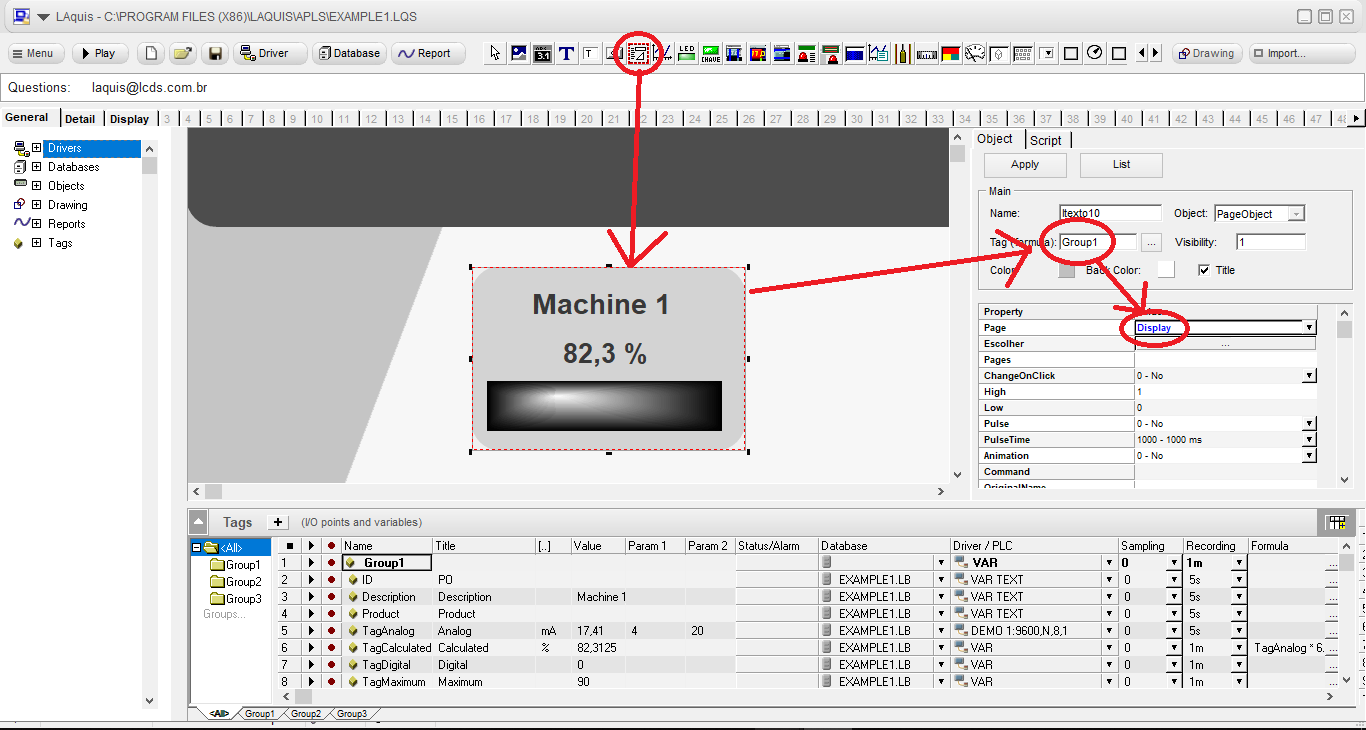
Then select the page object.
The page object allows you to show the content of another panel associated with the group or tag if you want.
Place the object on the panel, associate it with Group1. And put in the Page property, the name of the panel, in this case, Display like this:
Copy and place this page object twice.
But associate the second page object for Group2.
And associate the third object page for Group3.
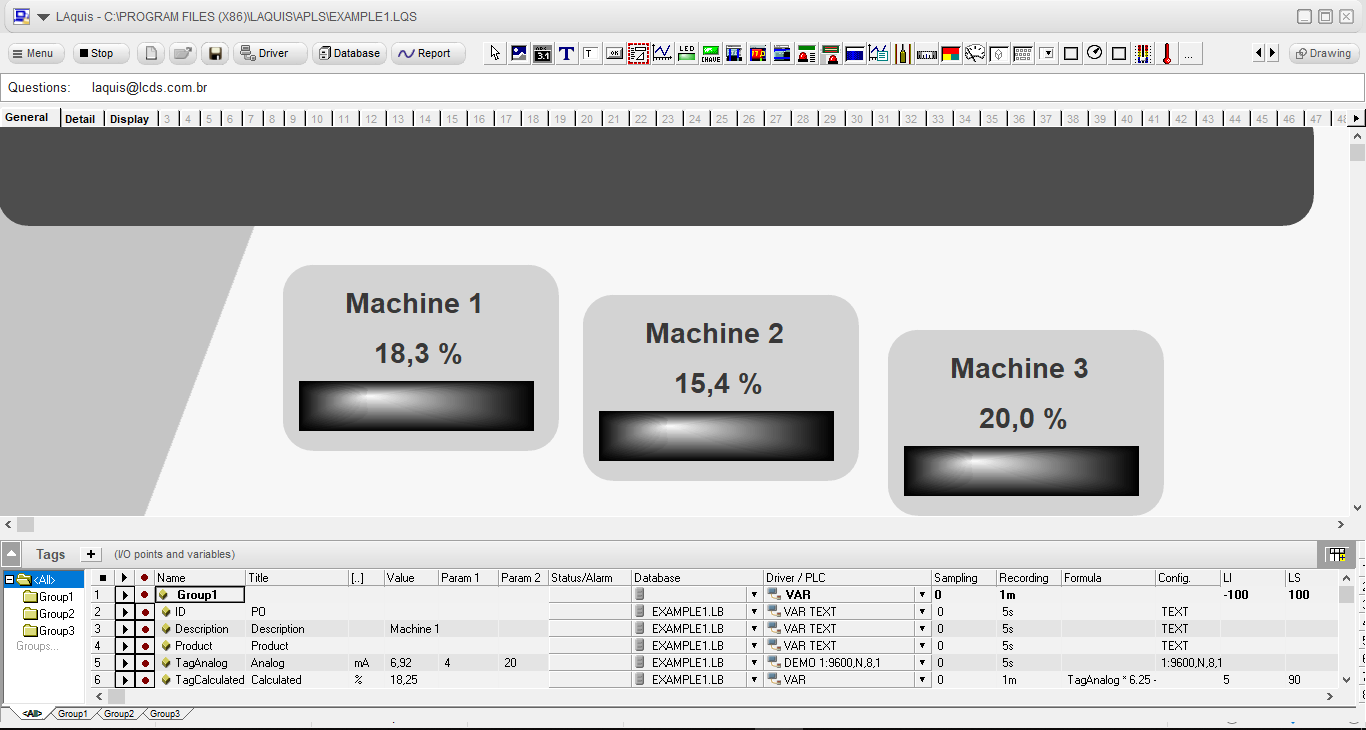
When running, it should look like this:
For the application.
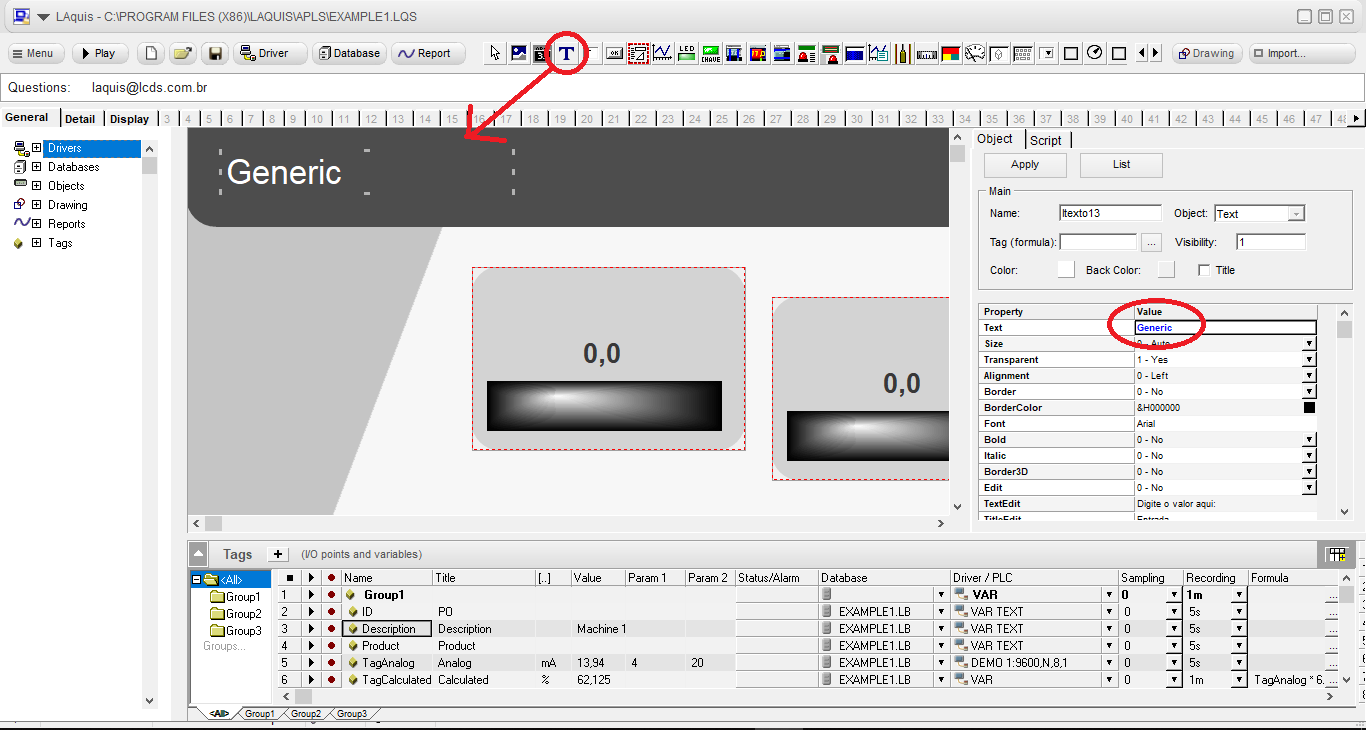
Place a Text object just to add a title. In this example, General screen like this:
We will create a general report that includes several groups.
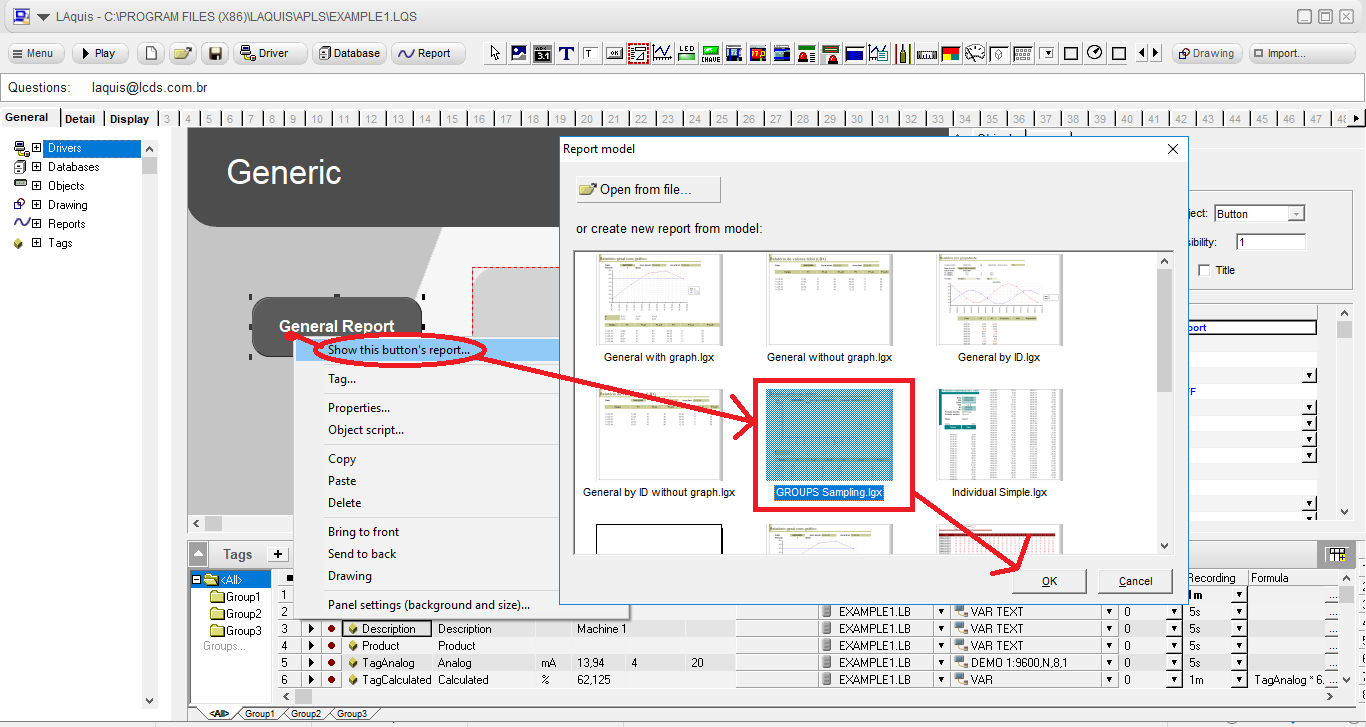
Place a button for the report, with the right mouse button on the button, select the report for this button, and select, for example in this case, the GROUPS Sampling model.
This model helps how to bring groups together in a report.
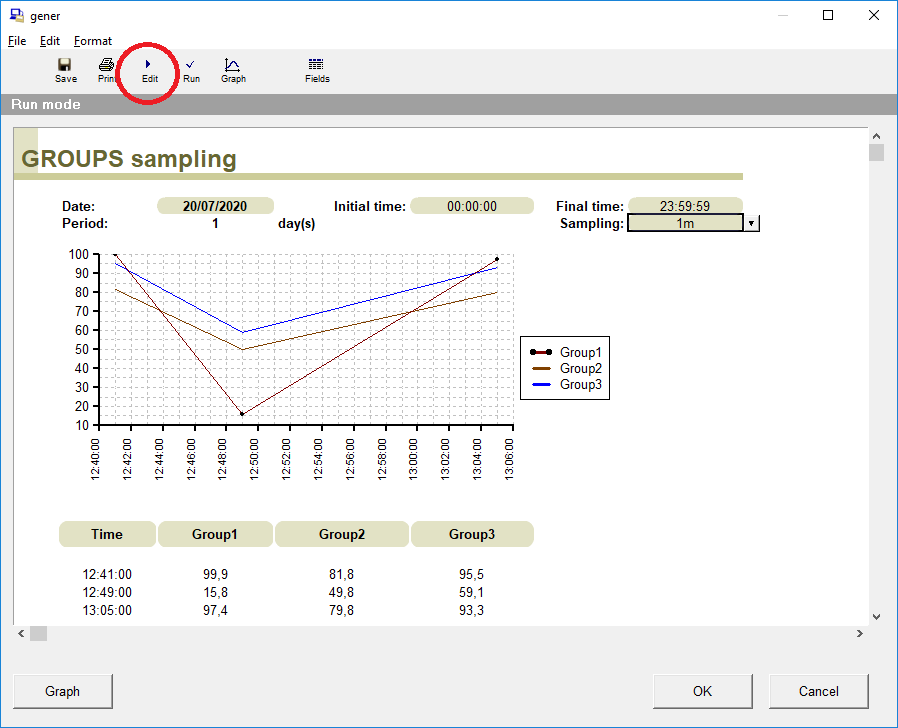
When opening the report click on Edit.
Then click on Fields.

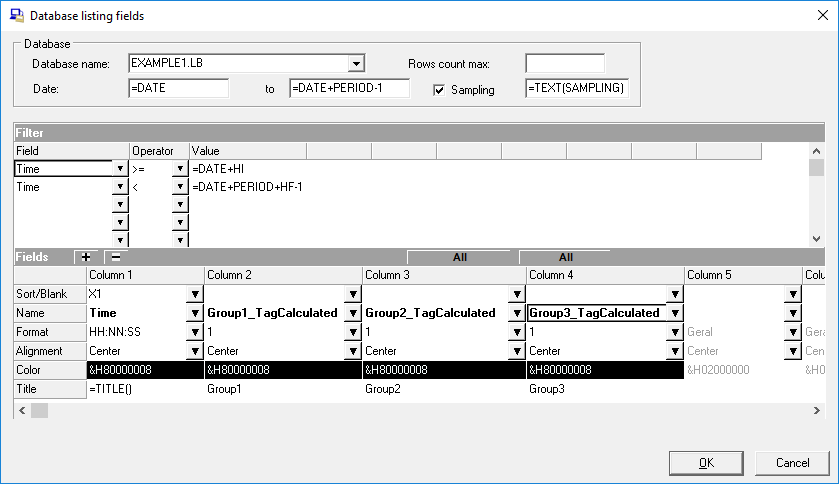
In this case, place, for example, the name tags including the group. Group1_TagCalculated, Group2_TagCalculated, Group3_TagCalculated.
It will show the three groups sampled according to the sampling option:
Sampling, in this model, is set there when you run the report:
Click Edit again.
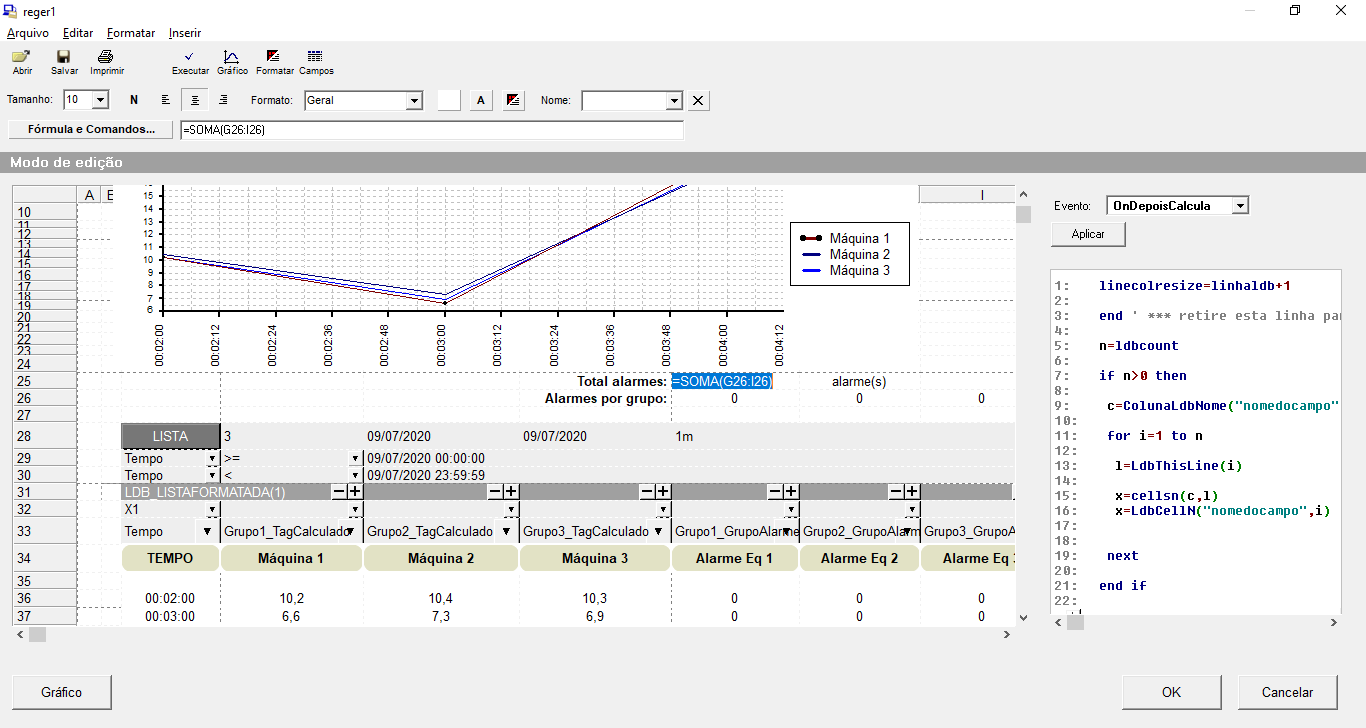
The report is a customizable generic spreadsheet, with formulas for automation, statistics, calculations, etc …
In this case, for example, you can add the number of alarms, average the values, etc …
You can also edit the listing directly, with the filter of tags, titles, etc.,. like this:
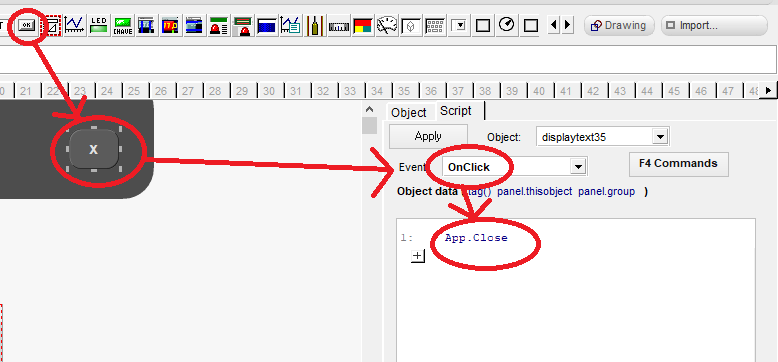
We will put a button to close on each screen. Place a button and put the App.Close script in the button’s OnClick event like this:
The same thing for a minimize button. In this case App.Minimize:

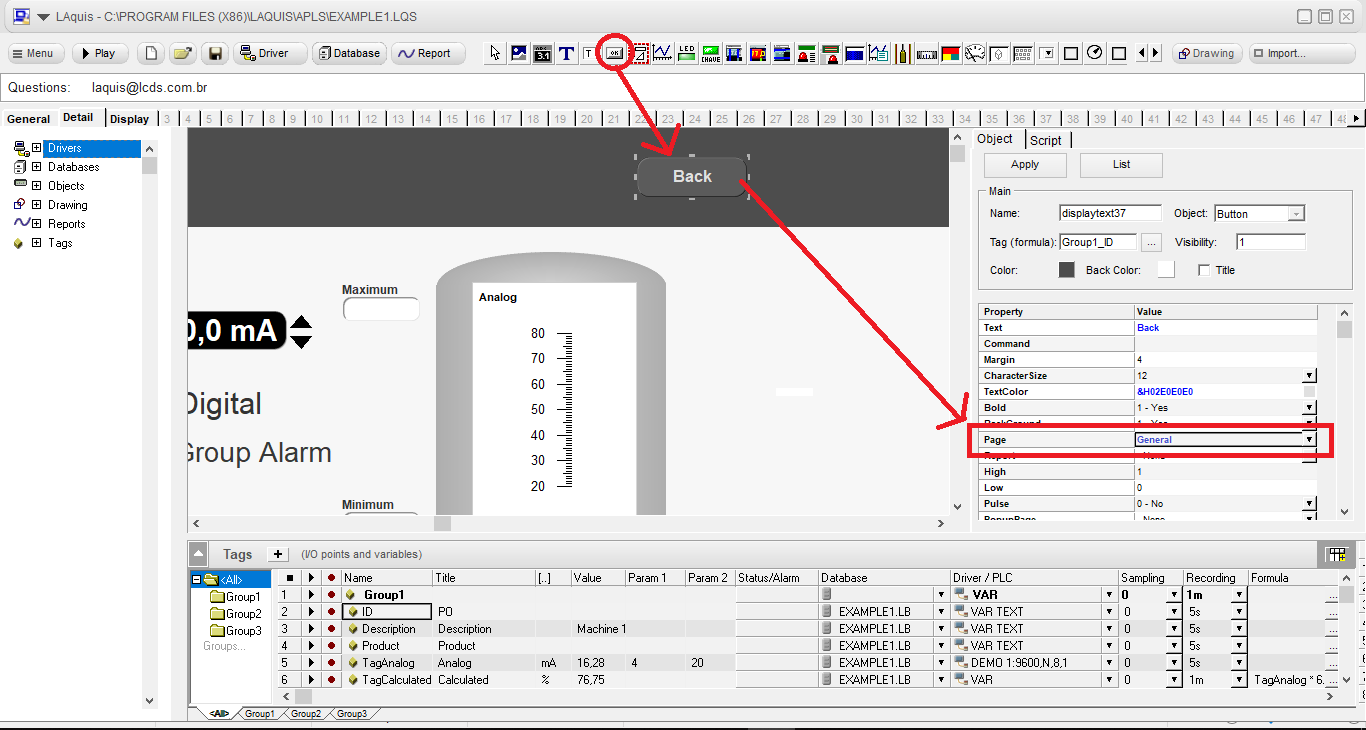
Place a button with the text Back on the Detail panel. And put the page name of the General panel in the Page property.
When the user clicks Back, the screen will return to the General panel.
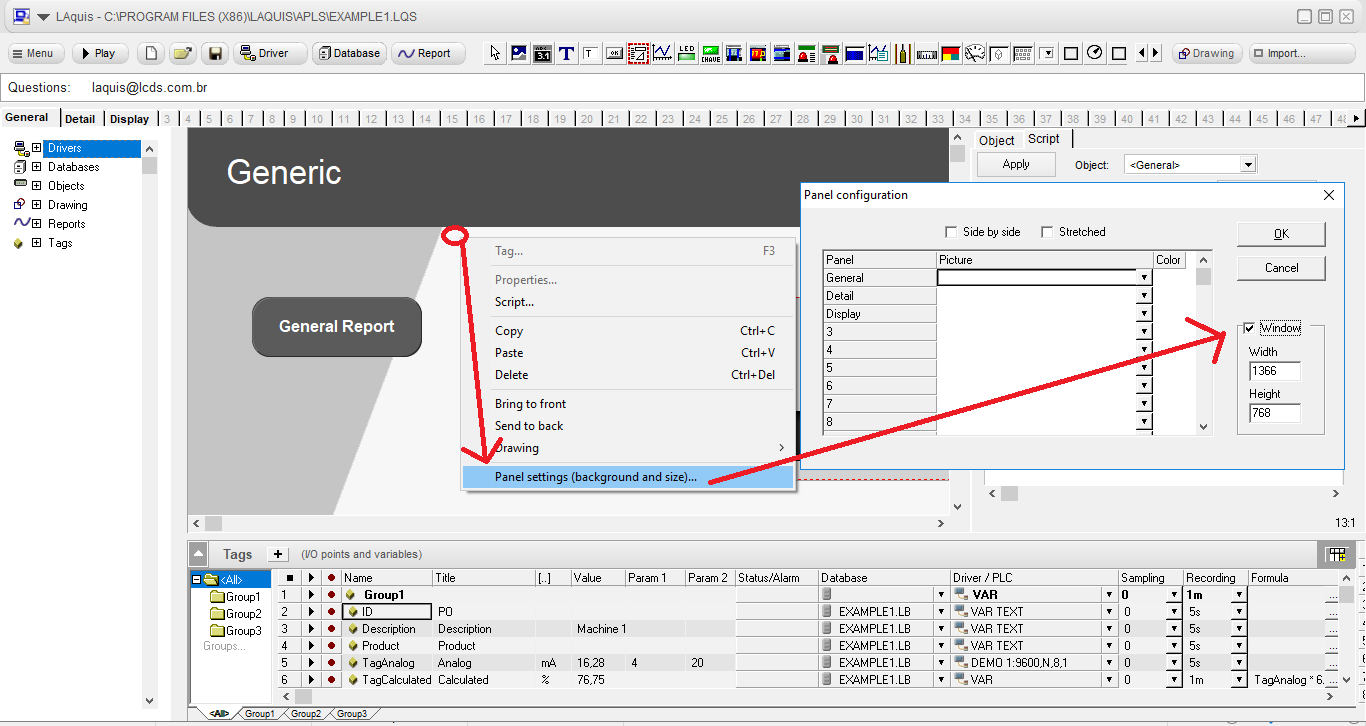
Then right-click on the panel, click Background and panel size and click Window and OK.
When starting the application, the screen shown will be just the panel, in run-time mode, without the editing options.
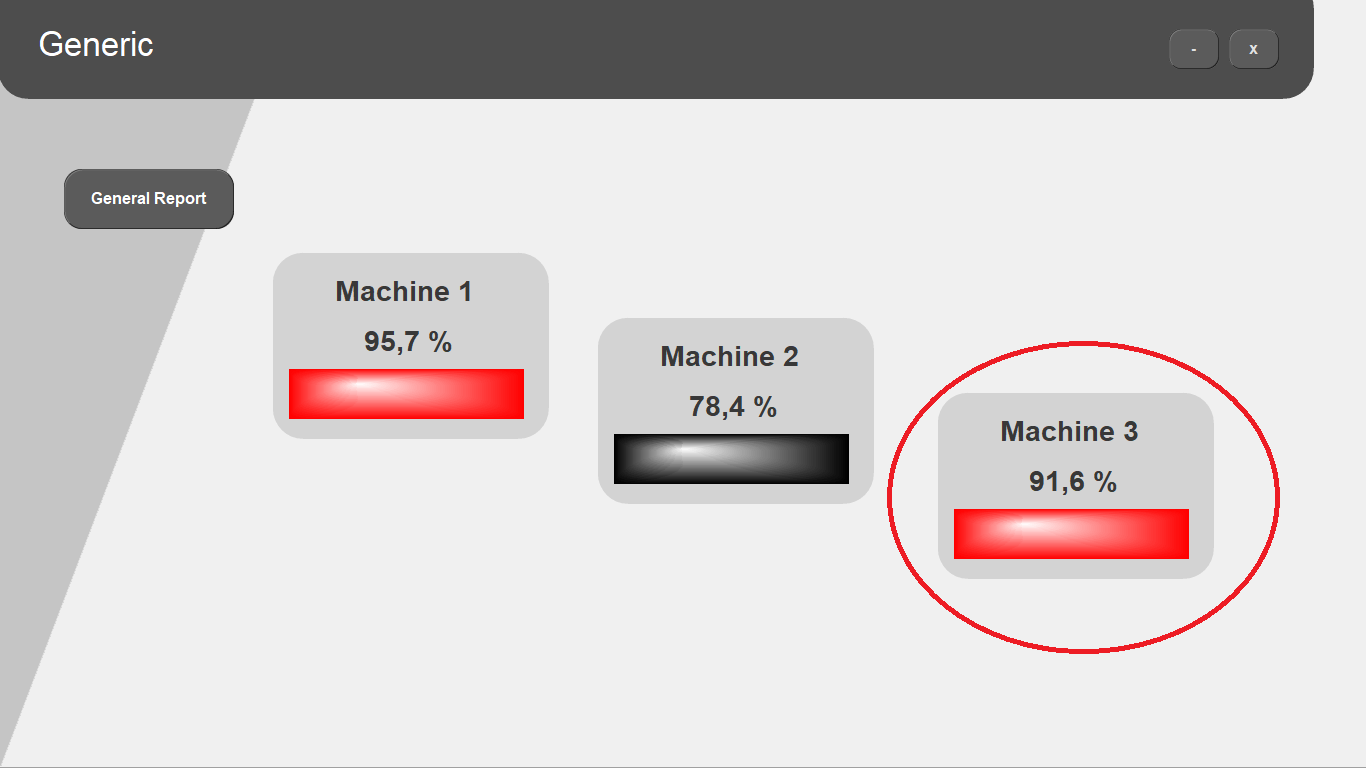
Let’s test the application.
Click the Start button.

Click on one of the objects page. For example on Machine 3.
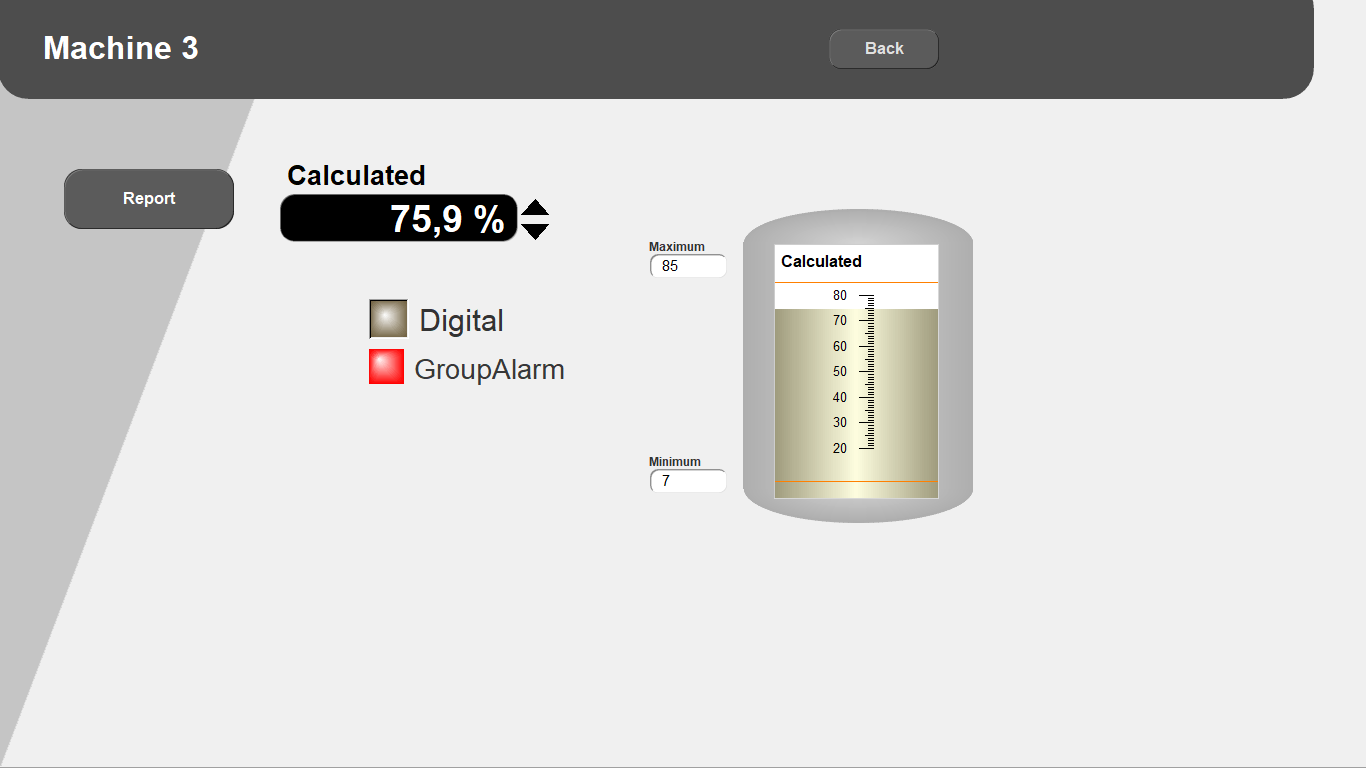
The selected screen should be Detail, but with the data from Group3 automatically.
Then, click the Report button.
The report automatically selected for Group3 (Machine3) should appear.
Then click on the Back button.
The screen should return to the General panel page.
Next step ( Step 4 )
